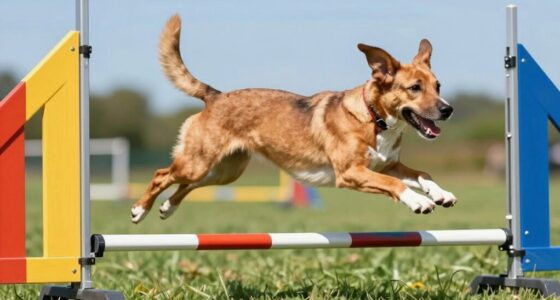
To guarantee your DIY agility gear stays safe, start by inspecting the PVC for cracks or damage and tighten any loose fittings with PVC cement or clamps. Check that obstacles are stable and anchored properly, with a low center of gravity and wide bases. test the ground for slippery spots—add textured mats or remove debris. Regularly maintaining and inspecting your setup helps prevent accidents; keep learning how to keep your gear safe for everyone.
Key Takeaways
- Regularly inspect PVC joints and fittings for cracks, looseness, or damage, and reinforce or re-glue as needed.
- Ensure all obstacles are securely anchored and stable, with a low center of gravity to prevent tipping.
- Check ground surfaces for debris, unevenness, and slipperiness; add non-slip mats or coatings to improve traction.
- Test grass firmness and dry wet patches thoroughly to reduce slipping hazards during use.
- Conduct routine safety inspections of all equipment and environment to identify and address potential hazards promptly.
Check Ground Surfaces for Slipping and Traction
Have you checked the ground surfaces where you plan to set up your agility gear? Ensuring a safe ground surface is paramount for traction control. Look for areas that are even and free of loose debris, which can cause slipping. Avoid surfaces that are too smooth or slick, such as wet grass or polished concrete, as they reduce grip. If you’re working on grass, test the firmness by pressing down with your foot to see if it’s too soft or muddy, which can lead to instability. Consider adding non-slip mats or mats designed for outdoor use to improve traction. Regularly inspect the surface before each session, especially after weather changes, to prevent slips and falls. Proper ground surface selection helps keep your training safe and effective. Additionally, consulting air quality can ensure the environment remains healthy and safe for both humans and pets during outdoor activities. Always verify that the surface provides adequate traction and stability for your agility exercises to prevent accidents.
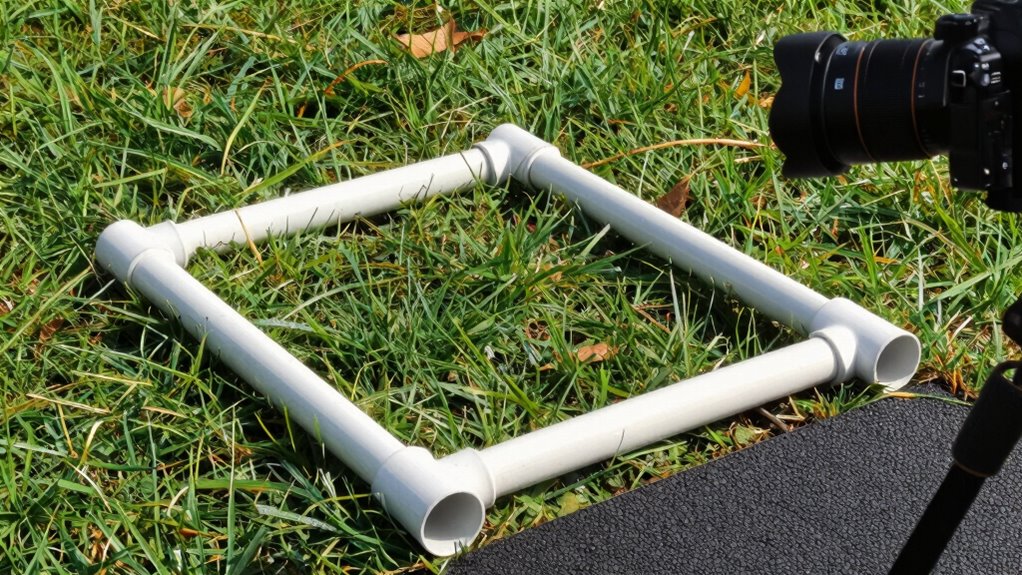
Inspect PVC Components for Durability and Safety

Start by examining your PVC components for any cracks or damage that could compromise safety. Make sure all joints are secure and tightly connected to prevent unexpected failures. Also, check for signs of corrosion or wear that might weaken the structure over time. Ensuring the material choice is appropriate can also improve overall durability and safety. Additionally, inspecting for structural integrity helps identify potential weak points before use. Regularly monitoring for wear and tear ensures the longevity and safety of your agility gear. Incorporating preventive maintenance practices can further help in early detection of issues and extend the lifespan of your equipment. Conducting periodic inspections allows for timely repairs and reduces the risk of accidents during use.
Check for Cracks
Inspecting PVC components for cracks is essential to guarantee your agility gear remains safe and durable. Crack detection helps prevent accidents caused by hidden damage. Over time, material fatigue can cause small cracks that weaken the structure. Carefully examine all PVC parts for signs of splitting, discoloration, or stress lines. Pay close attention to areas under stress or joints where cracks are more likely to develop. Additionally, understanding sound vibrations can help detect internal cracks through auditory cues. Look for fine lines or fractures on the surface, especially around joints and bends. Tap lightly to listen for hollow sounds indicating internal cracks. Check for discoloration or warping, which signals material fatigue and compromised integrity. Incorporating visual inspections into your regular maintenance routine can further enhance safety by catching issues early. Regular testing of material durability can also identify potential weaknesses before they lead to failure.
Ensure Secure Joints
After checking your PVC components for cracks, it’s important to verify that all joints remain secure and stable. You want to guarantee the joint integrity of your agility gear by inspecting each connection thoroughly. Look for any looseness, wobbling, or signs of stress at the joints. Make sure the fittings are properly glued and that there’s no separation between components. Material compatibility is also vital—you should confirm that the PVC pieces and fittings are compatible in size and type to prevent weak spots. Tighten or re-glue any joints that show signs of instability. Secure joints not only improve safety but also extend the lifespan of your equipment. Regularly inspecting and maintaining joint integrity keeps your agility gear safe and reliable for every use.
Inspect for Corrosion
Since PVC is resistant to rust and most weather elements, corrosion isn’t usually a major concern. However, conducting a corrosion inspection remains important to ensure your equipment’s durability and safety. Over time, metal components or fittings attached to PVC can degrade, affecting stability. Look for signs of metal degradation such as discoloration, pitting, or flaking around joints and connectors. Regular inspections can also help identify industry trends that may influence maintenance practices. Check for corrosion on metal fittings or fasteners attached to PVC parts. Inspect for any white, powdery residue indicating corrosion or metal breakdown. Ensure there are no cracks or weakened areas caused by corrosion or metal degradation. Incorporating preventive maintenance strategies can extend the lifespan of your agility gear and prevent costly repairs. Additionally, inspecting for metal corrosion can help detect early signs of deterioration that might compromise safety. Being aware of corrosion prevention techniques is essential for maintaining equipment integrity. Implementing proper storage practices can also significantly reduce the risk of corrosion over time. Regularly inspecting these areas helps prevent unexpected failures, keeping your agility gear safe and reliable.
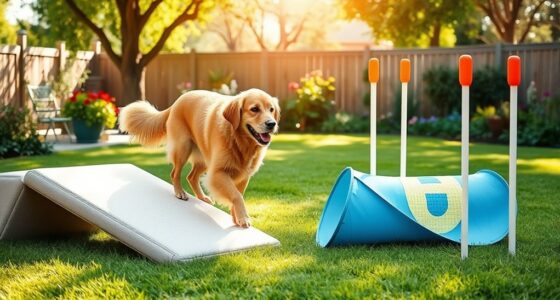
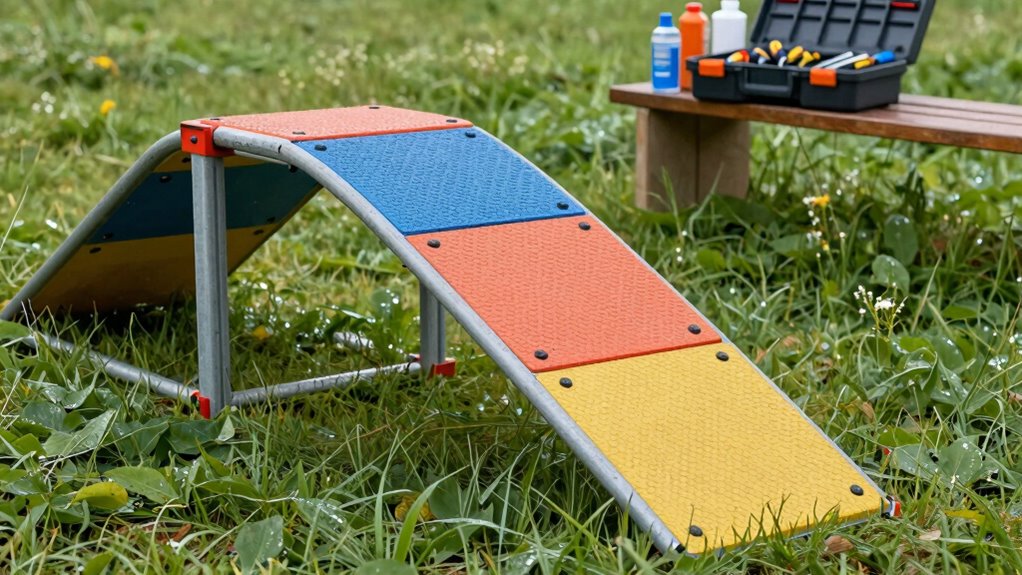
Make Sure Your DIY Obstacles Are Stable and Secure

Make Sure Your DIY Obstacles Are Stable and Secure
To guarantee your DIY obstacles are safe to use, you need to double-check their stability and security before each session. Focus on material selection and design considerations to ensure durability. Use sturdy, weather-resistant materials like PVC or treated wood, avoiding weak or cracked components. Check joints, fasteners, and connections for tightness and integrity. Secure the obstacle to the ground properly to prevent tipping or shifting. Consider the weight and balance during construction to enhance stability. Use the following table to evaluate your setup:
| Material Selection | Design Considerations |
|---|---|
| Durable, weatherproof | Wide base for stability |
| No cracks or weakness | Proper weight distribution |
| Secure fasteners | Reinforced joints |
| Non-slip surfaces | Low center of gravity |
| Regular inspection | Firm anchoring to ground |
Additionally, regularly inspecting for material fatigue and ensuring the obstacle remains in good condition can prevent accidents. Being aware of weather conditions can also impact the safety and stability of your DIY obstacles. Incorporating proper anchoring techniques can further improve stability and prevent accidents during use. Ensuring ongoing maintenance routines is essential for long-term safety and performance.
Spot Common Hazards in Your DIY Agility Setup
You need to watch out for loose PVC connections, which can cause obstacles to shift unexpectedly. Check the surface for slippery spots or uneven areas that could lead to slips or falls. Also, make certain all equipment is securely anchored to prevent it from tipping or moving during use. Regularly inspecting equipment stability helps ensure your setup remains safe over time. Additionally, consider incorporating smart safety features, such as sensors or alerts, to monitor your agility area for potential hazards in real-time. Being aware of hazard identification techniques can further help you proactively address risks before they cause accidents. Incorporating modern safety technology can enhance your ability to detect issues early and maintain a secure environment. Paying attention to safe setup practices is essential for creating a hazard-free agility zone.
PVC Connection Stability
Ensuring your PVC connections are stable is essential for a safe and reliable DIY agility setup. Weak or loose joints compromise connection integrity and can cause equipment failure. To reinforce joint stability, consider these tips:
- Use appropriate PVC cement to guarantee proper joint reinforcement.
- Double-check all connections for tightness before use.
- Avoid overstretching or twisting PVC pipes, which can weaken joints.
- Global coffee culture highlights the importance of cultural practices in traditional and modern beverage preparation, emphasizing the need for secure equipment in various settings.
Proper joint reinforcement prevents accidental disconnections during training, reducing hazards. Regularly inspect connections for cracks or signs of wear, and reapply cement if needed. Secure fittings firmly to maintain overall stability. Remember, sturdy connections are key to keeping your agility equipment safe and functional during every session.
Surface Traction Risks
Surface traction risks are a common hazard in DIY agility setups, especially when the flooring isn’t properly prepared. Uneven surfaces or slick patches can cause your dog to slip or trip, risking injury. Wearing appropriate traction footwear helps improve grip for you, but the surface itself must also be safe. Check for surface unevenness, which can create unexpected bumps or dips that challenge your dog’s footing. Always inspect the area before each session and smooth out rough patches or debris. Consider adding textured mats or turf for better grip.
| Hazard | Solution |
|---|---|
| Surface unevenness | Level the surface, add padding or turf |
| Slippery grass | Use textured mats or non-slip coating |
| Loose debris | Clean regularly, remove obstacles |
| Wet patches | Dry thoroughly, avoid rain exposure |
| Inadequate traction footwear | Wear shoes with good grip |
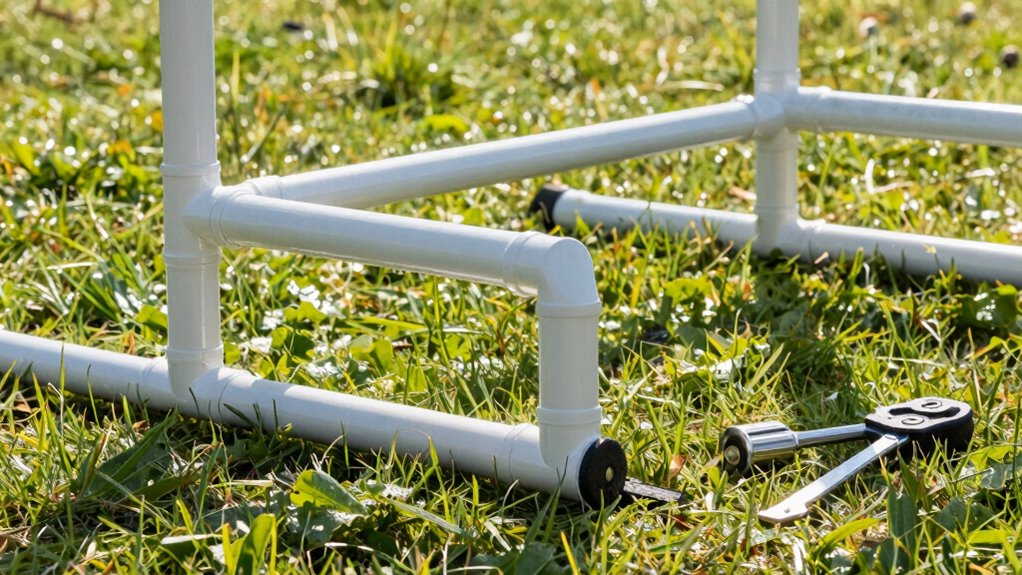
Proper Equipment Anchoring
Proper equipment anchoring is essential to prevent your agility gear from shifting or tipping during training. Secure anchor points ensure stability by evenly distributing weight, reducing the risk of accidents. When setting up, double-check that anchor points are firmly embedded and suitable for the equipment’s weight. Improper anchoring can cause gear to move unexpectedly, creating hazards. Consider these factors:
- Use sturdy, well-placed anchor points that can handle dynamic forces
- Balance weight distribution across all anchor points to prevent uneven stress
- Regularly inspect anchors for wear, loosening, or damage
Proper anchoring minimizes movement, keeping your setup safe. Ensure each piece is securely fastened and that the weight is evenly spread. This prevents tipping, shifting, and potential injuries during training sessions. Proper equipment anchoring is key to a safe, effective DIY agility course.
How to Reinforce and Secure Loose Fittings

Loose fittings on agility equipment can pose serious safety risks, so it’s essential to reinforce and secure them promptly. Start by inspecting all joints and fittings for looseness or wobbling. Apply joint reinforcement by tightening threaded connections or replacing worn-out components. Use appropriate fittings, such as PVC couplings or clamps, to improve fitting security. For threaded joints, consider adding PVC cement or thread sealant to prevent movement. For slip-fit connections, secure them with hose clamps or zip ties to prevent shifting during use. Always test each connection after reinforcement to ensure stability. Regularly check fittings before use, especially after weather exposure or heavy use. Reinforcing loose fittings keeps your agility gear safe, reliable, and ready for training sessions.
Modify Your Environment to Prevent Slips
To prevent slips during agility training, you should actively modify your environment to enhance traction and stability. Applying non-slip coatings to surfaces is an effective step, providing better grip on pavement or wooden floors. Additionally, making environmental adjustments like leveling uneven ground or adding textured mats creates safer pathways. You might also consider removing debris or loose materials that can cause slipping hazards. These modifications markedly reduce the risk of accidents and improve safety during training sessions. Using non-slip coatings is especially helpful on outdoor surfaces or areas prone to becoming slick when wet. Regularly inspecting and maintaining these environmental adjustments ensures the safety measures stay effective, keeping you and your dog secure for best training.
Your Easy Maintenance Checklist to Keep Gear Safe
Regular maintenance is essential to guarantee your agility gear remains safe and effective. Start by inspecting PVC sections for cracks or damage, and ensure all fittings are secure. Use PVC color coding to quickly identify different obstacle parts, making it easier to spot issues during routine checks. Clean surfaces regularly to prevent dirt buildup, which can cause slips or deterioration. Check stability by testing each obstacle’s firmness, and tighten any loose connections. For DIY obstacle customization, ensure modifications don’t compromise safety—double-check that added elements are securely attached and stable. Replace worn or damaged parts immediately, avoiding shortcuts that could lead to accidents. Keeping a simple maintenance checklist helps you stay consistent, ensuring your gear remains safe, durable, and ready for every training session.
Frequently Asked Questions
How Often Should I Replace PVC Parts for Safety?
You should replace PVC parts immediately if you notice cracks, warping, or significant wear during your regular safety inspections. For PVC maintenance, check your gear weekly to guarantee stability and integrity. If any damage is found, replace the components promptly to prevent accidents. Regular safety inspections help catch issues early, keeping your agility setup safe. Remember, timely replacement of compromised parts is vital for safe and effective training sessions.
What Are the Best Non-Slip Materials for Grass Surfaces?
A stitch in time saves nine, so choose the right materials now. For grass surfaces, artificial turf is a top non-slip option, providing good traction and durability. Rubber mats are also excellent, offering cushioning and slip resistance for agility training areas. Both materials help prevent slips and falls, ensuring safety. You should select based on your space, budget, and specific needs to keep your agility setup secure and effective.
How Can I Tell if My DIY Agility Gear Is Too Worn?
You can tell if your DIY agility gear is too worn by inspecting for significant wear and tear, such as cracks, splinters, or bent parts. Do a stability assessment by testing the equipment’s firmness—if it wobbles or shifts easily, it’s unsafe. Regularly check all joints and connections, replacing or repairing damaged components promptly to guarantee safety and stability during use.
Are There Any Specific Tools for Securing PVC Fittings?
Ever wondered if you’re using the right tools for PVC fittings? You can use specialized securing tools like PVC pipe clamps or slip-joint pliers to tighten fittings securely, ensuring stability. These tools help you grip and tighten the PVC fittings more effectively than regular pliers, reducing leaks or wobbling. Using the proper securing tools keeps your agility gear safe and durable, so your training sessions stay smooth and injury-free.
How Do Weather Conditions Affect the Durability of PVC Obstacles?
Weather conditions considerably impact the durability of PVC obstacles. Exposure to sunlight accelerates material degradation, causing PVC to become brittle over time. Rain and humidity can weaken joints and promote mold or mildew growth. Freezing temperatures may cause PVC to crack or warp. To extend your obstacle’s lifespan, store it indoors during harsh weather, regularly inspect for damage, and consider applying UV protectant coatings to minimize weather impact.
Conclusion
So, you’ve turned your yard into a mini agility course—just remember, safety isn’t optional, it’s essential. Check those surfaces, tighten those fittings, and keep an eye out for sneaky hazards. Because nothing screams “professional trainer” like a DIY obstacle that doesn’t turn into a slip-and-slide mid-run. Stay vigilant, stay safe, and maybe invest in a helmet—just in case your DIY skills aren’t quite Olympic-worthy yet. After all, agility is fun until someone takes a tumble!