To set up a budget-friendly backyard agility course, use household items like bottles, shoes, or cups as markers, and draw pathways with chalk or sticks. Stack books or use broomsticks for low hurdles, and create zig-zag or ladder drills with painter’s tape. Incorporate balance beams with narrow boards and keep the space simple and safe. With these easy tips, you’ll be ready to craft an effective course—keep going to discover more ideas to upgrade your setup.
Key Takeaways
- Use household items like bottles, shoes, or cups as markers to create obstacle pathways.
- Set up low hurdles with stacked books or broomsticks for safe jumping exercises.
- Create zig-zag or slalom courses with chalk, tape, or sticks for quick directional changes.
- Incorporate balance drills using a narrow plank or makeshift balance beam for stability training.
- Rotate and customize your course regularly using inexpensive materials to keep workouts engaging and progressive.
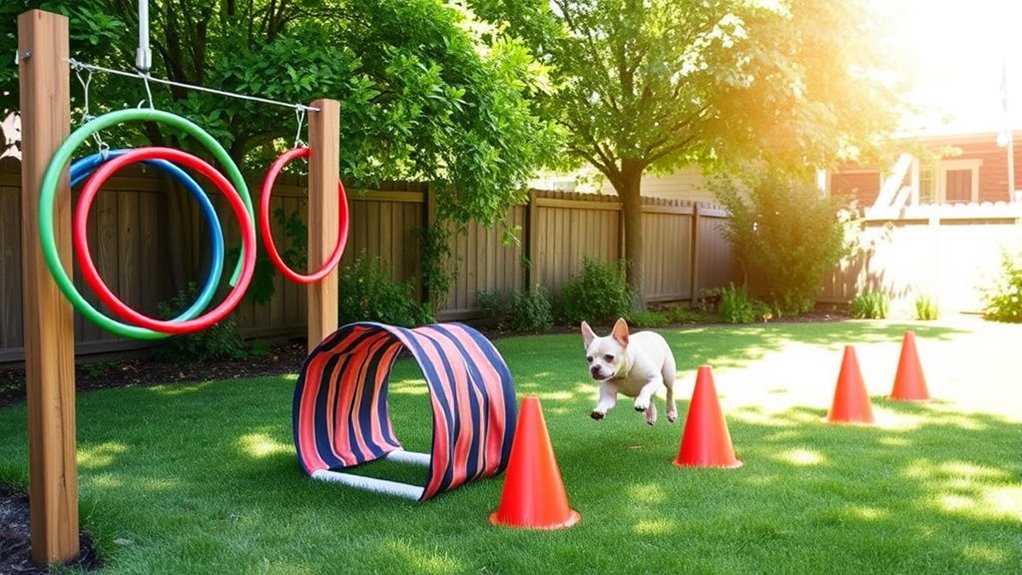
Improving agility at home is an effective way to boost your overall fitness and keep your body active. You don’t need a fancy gym or expensive equipment to develop quickness, coordination, and balance. With a little creativity and some inexpensive materials, you can set up a backyard agility course that challenges your body and sharpens your reflexes. The key is to focus on versatility and simplicity, using what you already have or can easily acquire.
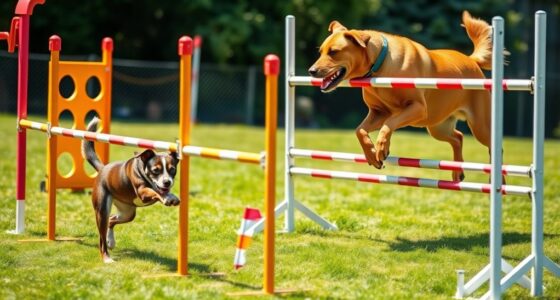
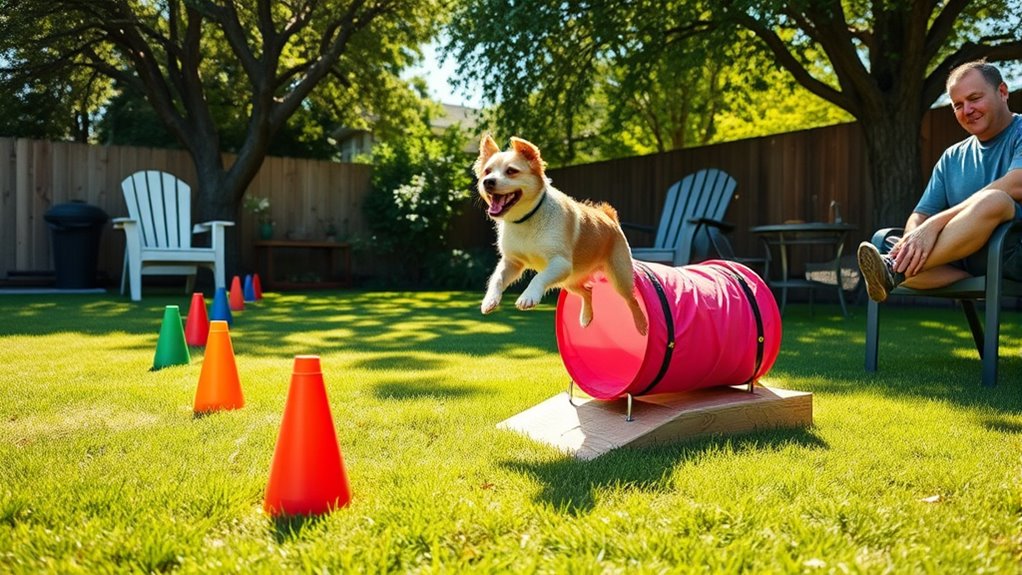
Start by evaluating your available space and gathering basic supplies. Cones, often used for sports drills, can be replaced with everyday items like empty bottles, plastic cups, or even shoes lined up in a row. These will serve as markers for weaving drills or to designate boundaries. If you don’t have cones, you can use sticks, broom handles, or chalk to draw lines directly on the ground. The goal is to create pathways that force you to change directions quickly, improving your footwork and coordination.
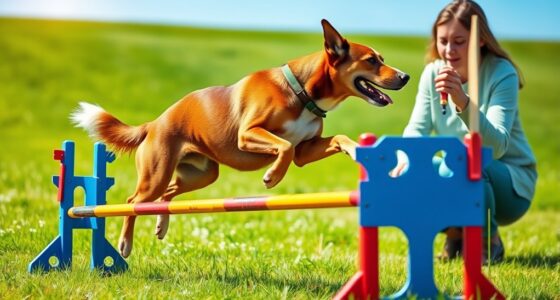
Next, incorporate jumps into your course. Use small hurdles made from household items: stacked books, broomsticks laid across two objects, or even a row of sturdy boxes. These hurdles help develop explosive power and agility as you leap over them in quick succession. For a softer landing, ensure the obstacles are low enough to jump over comfortably but high enough to challenge your vertical quickness. To add variety, you can incorporate ladder drills using painter’s tape or chalk lines on your driveway. Draw parallel lines about two feet apart and practice quick foot movements in and out of the lines, mimicking ladder drills used by athletes.
You can also add a slalom element by setting up a zig-zag path with your markers. Run through it as fast as possible, focusing on tight turns and rapid changes of direction. This enhances your ability to quickly shift weight and maintain balance. If space allows, include a balance beam—either a sturdy plank on the ground or a narrow piece of wood—so you can practice walking heel-to-toe, which helps improve overall stability. Additionally, exploring DIY training tools can further enhance your agility practice without breaking the bank.
Finally, make sure your course is safe and adaptable. Use soft surfaces like grass or turf to cushion landings, and clear the area of any hazards. Keep your course challenging but manageable, increasing complexity or speed as you build confidence. By routinely rotating the layout and adding new elements, you’ll stay motivated and ensure your agility continues to improve. Setting up a backyard agility course on a budget proves that with some resourcefulness, you can create an effective training space that boosts your fitness and keeps you active right at home.
Frequently Asked Questions
What Safety Precautions Should I Take During Setup?
You should inspect all equipment for sharp edges or damage before setting it up. Make sure the area is clear of hazards like rocks, sticks, or debris that could cause injury. Use secure anchors or weights to keep obstacles stable, and avoid placing them near areas where your dog could slip or fall. Supervise your dog at all times, and gradually introduce new equipment to prevent accidents.
How Can I Train My Dog to Use the Course?
To train your dog to use the course, start with basic commands like “sit” and “stay” to build focus. Introduce each obstacle gradually, using treats and praise to encourage progress. Keep training sessions short and fun, ensuring your dog stays motivated. Use positive reinforcement consistently, and practice regularly to build confidence. Be patient, and celebrate small successes to help your dog feel comfortable and enthusiastic to navigate the course.
What Materials Are Best for Outdoor Agility Equipment?
Think of your backyard as a playground where your dog’s dreams take flight. Durable materials like PVC pipes and wooden planks are your best allies—they’re sturdy, weather-resistant, and budget-friendly. Use flexible tubing for tunnels and low-cost items like crates or broomsticks for jumps. These materials stand up to outdoor elements, ensuring your pup’s adventures are safe, fun, and built to last, no matter the weather.
How Often Should I Update or Change the Course?
You should update or change your course every few months to keep things fresh and challenging for your dog. Regularly assess the equipment for wear and tear, and swap out or modify obstacles to prevent boredom and build new skills. If your dog seems uninterested or easily bored, it’s time for a change. Keep safety in mind, and don’t wait too long to refresh the course to maintain motivation and enthusiasm.
Are There Age or Breed Considerations for Home Courses?
Imagine your pup maneuvering a colorful, exciting course tailored just for them. Age and breed do matter—young puppies need gentle, low-impact obstacles, while active breeds like border collies thrive on challenging setups. Keep safety in mind; avoid high jumps or sharp turns for older dogs or small breeds. Adjust obstacles to match your dog’s size and energy, ensuring they’re comfortable, confident, and enthusiastic to play every time they run the course.
Conclusion
Remember, where there’s a will, there’s a way. Setting up a backyard agility course on a budget is easier than you think. With a little creativity and effort, you can create a fun, challenging space for your dog to learn and play. Keep it simple, stay consistent, and enjoy the process together. In the end, the joy of watching your dog improve and have fun is worth every effort you put in.