
Creating a DIY cat scratcher from household items is simple and budget-friendly. You can repurpose cardboard, old rugs, mats, or carpet remnants to make scratchable surfaces your cat will love. Use safe, natural materials like sisal or untreated wood, and reinforce structures for stability. To keep your cat engaged, add some catnip or toys nearby. Want tips on making scratchers your cat actually uses? Keep exploring to discover easy, effective ideas.
Key Takeaways
- Use sturdy, natural materials like cardboard, sisal, or untreated wood to create durable, safe scratchers cats naturally prefer.
- Repurpose household items such as cardboard boxes, rugs, or carpet remnants into scratch pads with secure adhesives or sewing.
- Incorporate natural fibers like sisal or jute to enhance durability and attractiveness for scratching behavior.
- Ensure all materials are non-toxic, untreated, and free from chemicals or paints harmful to cats.
- Position DIY scratchers near favorite resting spots or windows to encourage regular use and prevent furniture damage.

Minyii 78.7"x15.8" Cat Scratch Mat, Trimmable Self-Adhesive Carpet, DIY Climb Cat Scratcher for Furniture Couch or Wall Protector, Covering Cat Scratching Post Replacement Pads (Beige)
[Sanctuary of Space] Measuring an expansive 78.7"x15.8"x0.16". It provides enough coverage area for cat tree shelves, cat scratching…
As an affiliate, we earn on qualifying purchases.
As an affiliate, we earn on qualifying purchases.
Why DIY Cat Scratchers Are Better for Your Cat and Your Home
Creating your own cat scratcher allows you to customize it to your cat’s preferences and your home’s decor, ensuring it fits seamlessly into your space. DIY scratchers often show better cat scratcher aesthetics, blending naturally with your decor instead of looking out of place. Plus, making your own can considerably reduce the DIY scratcher cost compared to store-bought options. You control the materials, style, and size, creating a more appealing and functional scratching post for your cat. This personalized touch encourages your feline friend to use it more often, protecting your furniture. Additionally, crafting it yourself means you can adapt the design to suit your space and your cat’s habits, making it a practical, stylish, and budget-friendly solution. Incorporating Free Floating features into your design can enhance its appeal and functionality for your cat. Using sustainable materials can also make your project more environmentally friendly and in line with a smart, well-being-focused home. Moreover, selecting non-toxic, eco-friendly supplies ensures your pet’s safety while supporting sustainable living. Understanding evidence-based insights on safe materials can help you choose the best options for your pet’s health.

ANWA 32" Tall Cat Scratching Posts for Indoor Cats, 3-in-1 Vertical Cat Scratching Post with Plush Toys, Premium Sisal Post for Cats at All Ages with Reinforced Stable Base, Beige
【PREMIUM SISAL CAT SCRATCHING POST】This tall cat scratching post is made of 100% natural non-toxic sisal, proper sturdiness…
As an affiliate, we earn on qualifying purchases.
As an affiliate, we earn on qualifying purchases.
How to Choose Safe, Non-Toxic Materials for DIY Scratchers
When selecting materials for your DIY cat scratcher, it’s essential to avoid toxic substances that could harm your cat. Opt for natural, untreated options like unpainted wood or sisal, and use non-toxic adhesives to keep everything safe. By choosing these materials, you guarantee your cat can enjoy their scratcher without exposure to harmful chemicals. Additionally, considering Italian craft traditions can inspire you to incorporate locally sourced, eco-friendly materials that are both beautiful and safe for your feline friend. Incorporating sustainable materials ensures your project aligns with environmentally conscious practices while providing a safe environment for your pet. Using durable weather-resistant materials can also extend the lifespan of your DIY scratcher, making it a long-lasting addition to your home. Selecting the right eco-friendly materials can further enhance the sustainability of your project and reduce your environmental footprint.
Toxic Material Risks
Choosing the right materials is essential to guarantee your DIY cat scratcher is safe for your feline friend. You need to consider chemical exposure, as some household items contain substances that can be harmful if ingested or touched frequently. Materials with questionable safety could release fumes or residues that pose health risks to your cat. Always prioritize material safety by avoiding treated woods, painted surfaces, or anything with synthetic coatings or adhesives. Opt for natural, untreated items or those labeled non-toxic. Remember, cats often chew and scratch vigorously, increasing their risk of ingesting harmful chemicals. Using safe, non-toxic materials helps prevent potential poisoning or skin irritation, ensuring your DIY project is not just fun but also safe for your furry companion. Additionally, understanding air quality in your home can further reduce potential exposure to harmful substances, creating a healthier environment for your cat. Checking for off-gassing from certain materials can also help prevent respiratory issues. Incorporating proper ventilation during and after the crafting process can further minimize inhalation of any residual fumes. Being aware of volatile organic compounds (VOCs) can help you choose materials that emit fewer airborne toxins, further protecting your cat’s health.
Natural, Untreated Options
To keep your DIY cat scratcher safe, focus on selecting natural, untreated materials that won’t harm your feline. Look for options with natural finishes, such as plain wood or bamboo, which haven’t been coated with chemicals or dyes. Avoid treated lumber or plywood that may contain formaldehyde or other toxins. If you want to add color or protect the surface, choose toxin free paints or stains specifically labeled as non-toxic and safe for pets. These products ensure your cat won’t ingest harmful chemicals while scratching or lounging. Remember, the goal is to create a durable, safe, and inviting surface that encourages healthy scratching without exposing your cat to unnecessary risks. Prioritize natural, untreated materials for peace of mind. Additionally, using sustainable materials can help reduce environmental impact while keeping your pet safe. Opting for eco-friendly choices not only benefits your cat but also supports environmental conservation efforts.
Non-Toxic Adhesives
Since adhesives hold the components of your DIY cat scratcher together, selecting non-toxic options is essential for your pet’s safety. Look for glues labeled as pet-safe or non-toxic, such as those made from natural ingredients or specifically designed for children’s crafts. This helps prevent exposure to harmful chemicals, especially if your cat tends to chew or scratch the surface. When choosing scratching post styles, consider those that incorporate catnip enrichment, which naturally attracts cats and encourages scratching. Using safe adhesives helps preserve the integrity of these materials without risking your cat’s health. Always read labels carefully and opt for eco-friendly, non-toxic options, so your homemade scratcher is both enticing and safe for your feline friend. Incorporating pet-safe materials can further enhance the safety and durability of your DIY project. Additionally, ensuring proper air purifier maintenance around your workspace can help reduce dust and chemical fumes during crafting. Following safety guidelines for adhesive application ensures your project remains safe for your pet and environmentally friendly, while incorporating Indonesian decor masks or other cultural artifacts into your space can also create an inspiring environment that your cat can enjoy exploring safely.

Natural Scratch Cat Scratching Post-24 Cedar Post
Soft but rough cedar texture cats love.
As an affiliate, we earn on qualifying purchases.
As an affiliate, we earn on qualifying purchases.
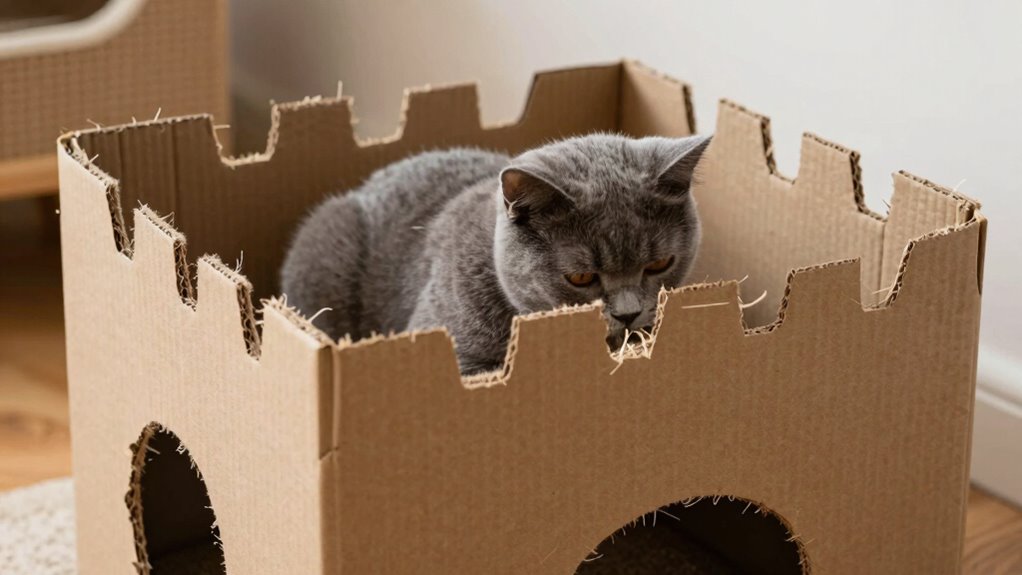
Essential Household Items You Can Turn Into Cat Scratchers
Turning everyday household items into cat scratchers is a simple and cost-effective way to keep your feline entertained. Items like sisal rugs, cardboard boxes, and wooden furniture can be repurposed into scratching posts. Incorporate catnip benefits by sprinkling some on these surfaces to attract your cat. When placing your scratcher, consider ideal scratching post placement—near favorite lounging spots or entrances—encourages use and prevents damage elsewhere. Here’s a quick visual guide:
| Household Item | Best Placement | Tips |
|---|---|---|
| Sisalg rug | Near sleeping areas | Add catnip to boost appeal |
| Cardboard box | By windows or doors | Replace when worn out |
| Wooden furniture | Corner of rooms | Secure firmly to prevent tipping |
| Old scratching posts | High-traffic zones | Refresh with catnip spray |
| Carpet remnants | Near feeding stations | Use as temporary scratchers |
This approach makes scratching fun and beneficial for your cat, and choosing appropriate materials can help prevent damage to valuable furniture. Additionally, providing a variety of different textures can keep your cat engaged and satisfied with their scratching outlets. Properly maintaining and rotating these items can also maintain your cat’s interest, reducing the likelihood of unwanted scratching behavior elsewhere.

FUKUMARU 5 PCS Cat Scratching Boards, 11.4 Inch Width Ex-Large Cat Scratcher Box, Reversible Cardboard Scratchers for Indoor Cats, Cat Scratch Box for Large, Medium and Small Cats, Protect Furniture
5 PCS Wider Cat Scratchers Box – Box Size: 16.34" L x 11.42" W x 5.51" H, Cardboard…
As an affiliate, we earn on qualifying purchases.
As an affiliate, we earn on qualifying purchases.
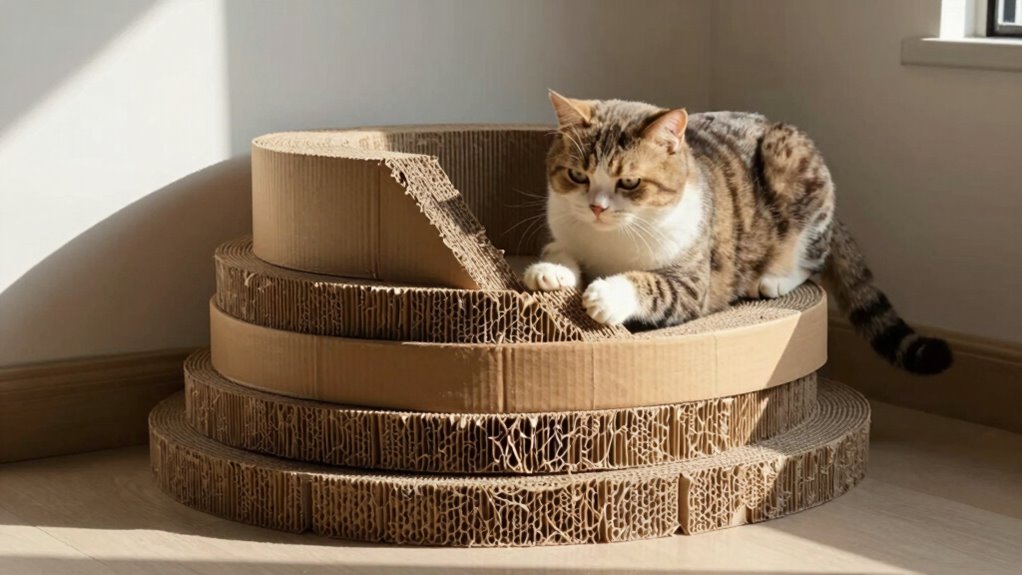
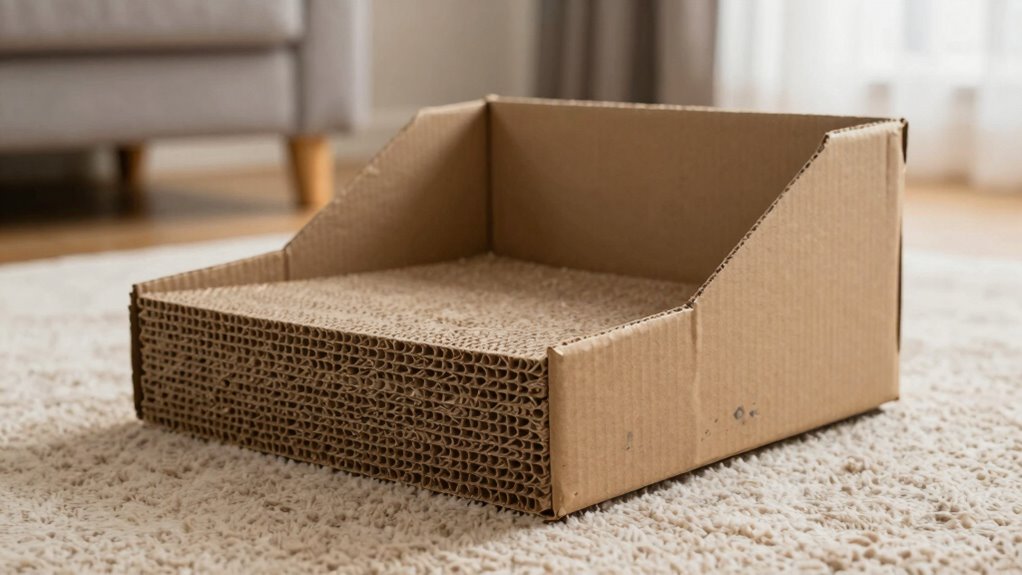
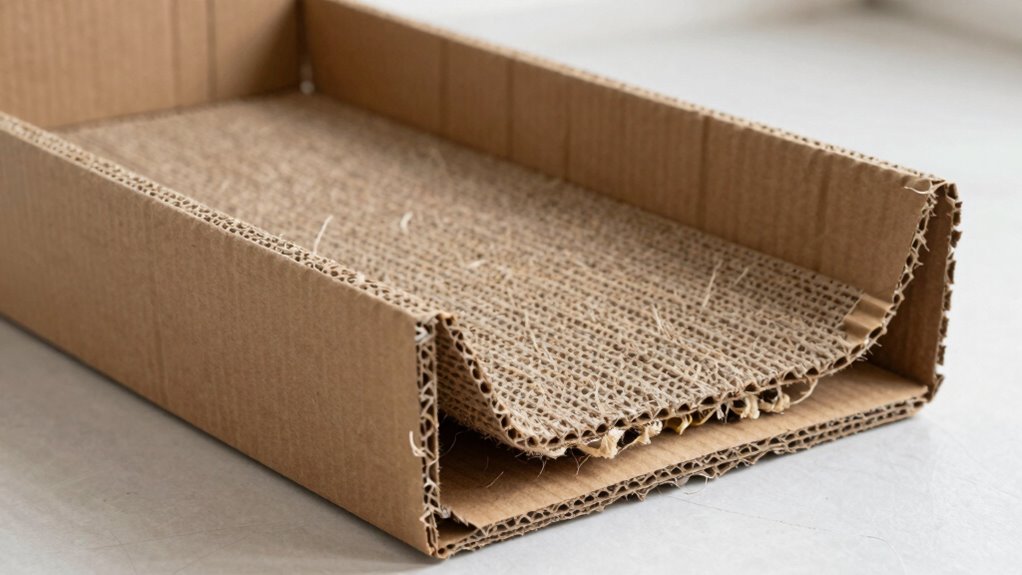
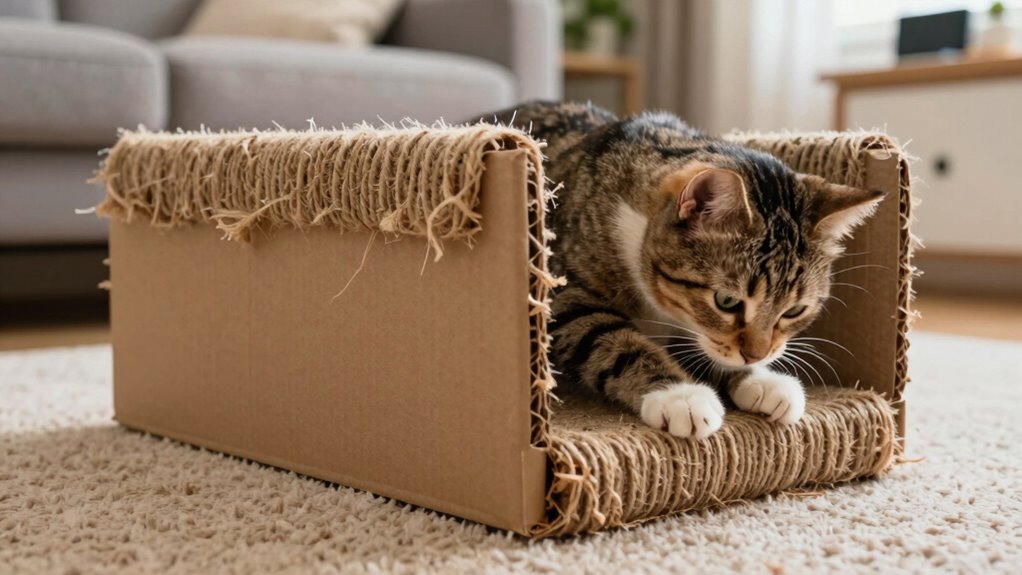
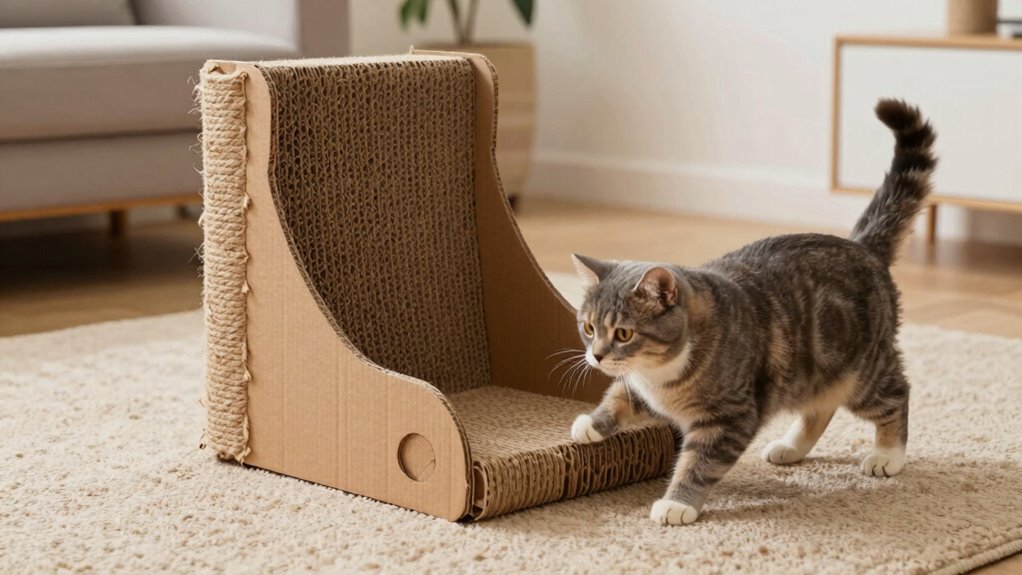
Step-by-Step: Making a Cardboard Scratchpad
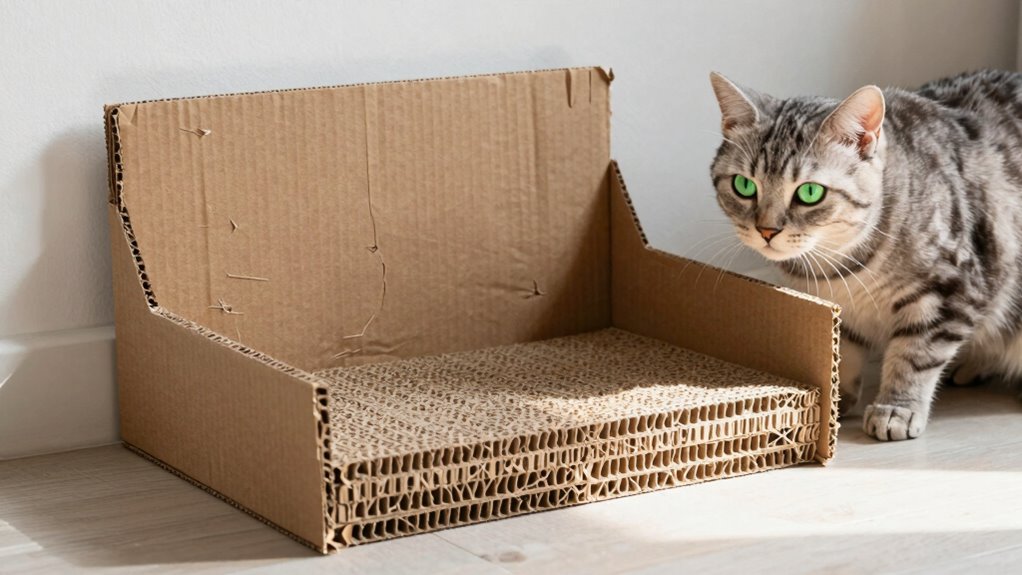
Creating a homemade cardboard scratchpad is a straightforward project that provides your cat with a satisfying surface to scratch and stretch. To start, gather sturdy cardboard boxes and cut them into strips about 3 inches wide. Stack the strips, aligning them evenly, and secure them with glue or tape along the edges. As you assemble, keep in mind your cat’s natural scratching posture—encouraging a stretch of the paws and shoulders. The textured surface enhances the cat’s sensory experience, making the scratchpad inviting. Once assembled, place the scratchpad in your cat’s favorite spot. This simple DIY encourages healthy scratching habits while satisfying your cat’s sensory needs and supporting proper stretching. Using recycled materials can also lessen your environmental impact and promote sustainability. Your feline will appreciate the effort, and you’ll enjoy a cleaner, scratch-appropriate zone.
How to Repurpose Rugs and Mats Into Durable Cat Scratchers
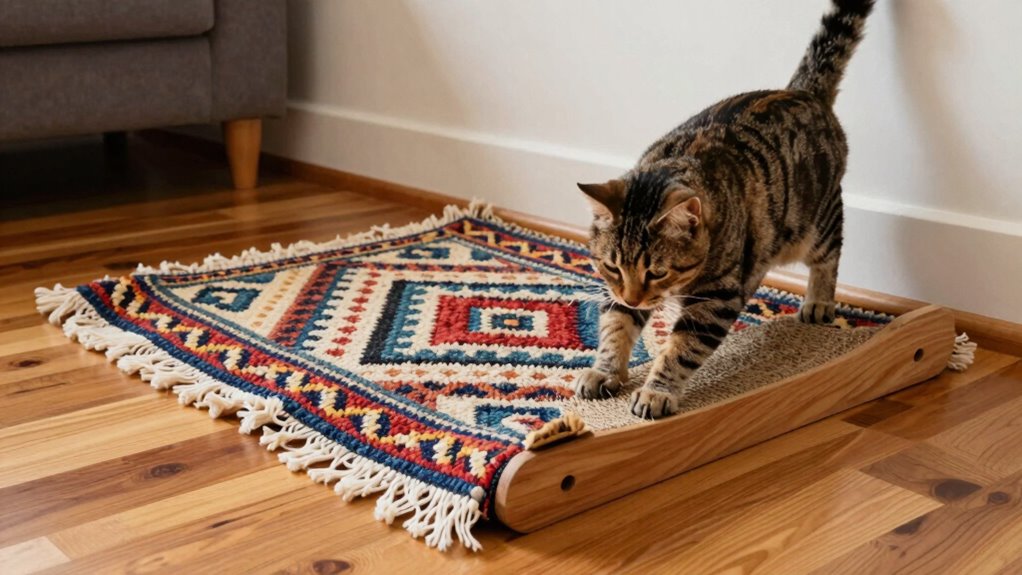
Start by choosing rugs and mats made from sturdy, natural fibers that your cat will enjoy scratching. Then, gather materials like reinforcing backing and safe adhesives to strengthen your project. Finally, use safe cutting tools and follow proper assembly steps to create a durable, secure scratcher your cat will love.
Selecting Suitable Rugs
Choosing the right rug or mat is essential for making a durable and satisfying DIY cat scratcher. Focus on fiber thickness, as thicker fibers tend to withstand scratching better and last longer. Rugs with dense, tightly woven textures provide more resistance than loose or shaggy ones, which can be easily torn apart by your cat’s claws. Look for rugs with a firm, consistent texture that won’t easily fray or shed fibers. Avoid flimsy or lightweight mats that lack durability. Natural fibers like sisal or jute are ideal because they’re sturdy and appealing to cats. The rug’s texture should invite scratching without being so rough that it damages your cat’s claws or your furniture. Picking a suitable rug ensures your DIY project remains effective and enjoyable for your feline friend.
Reinforcing Durability Materials
To guarantee your DIY cat scratcher lasts, it’s important to reinforce the base and surface with durable materials. Using sturdy fabrics like thick rugs or mats enhances material longevity and wear resistance, ensuring the scratcher withstands frequent use. Consider applying a layer of heavy-duty adhesive or sewing reinforced edges to prevent fraying and peeling over time. Adding a backing of plywood or a similar firm material can provide extra stability, helping the surface resist tearing. Choosing materials that resist scratching and tearing is essential for maintaining durability. Avoid lightweight or flimsy fabrics that quickly deteriorate. By focusing on materials with high wear resistance, your repurposed rug or mat will stand up to your cat’s scratching habits, keeping it functional and attractive longer.
Safe Cutting and Assembly
When repurposing rugs and mats into a cat scratcher, safety should be your top priority during cutting and assembly. Start by choosing tools that prioritize material safety, like sharp scissors or a utility knife with a sturdy handle. Use proper cutting techniques:
- Place the rug on a stable, flat surface.
- Keep your fingers away from the blade’s path.
- Cut slowly along your marked lines to avoid slips.
- Use a straightedge for clean, even cuts.
Always wear protective gloves if needed, and ensure your workspace is well-ventilated. Double-check that all edges are smooth to prevent injury to your feline. Following these guidelines guarantees a safe process and a durable, inviting scratcher your cat will love.
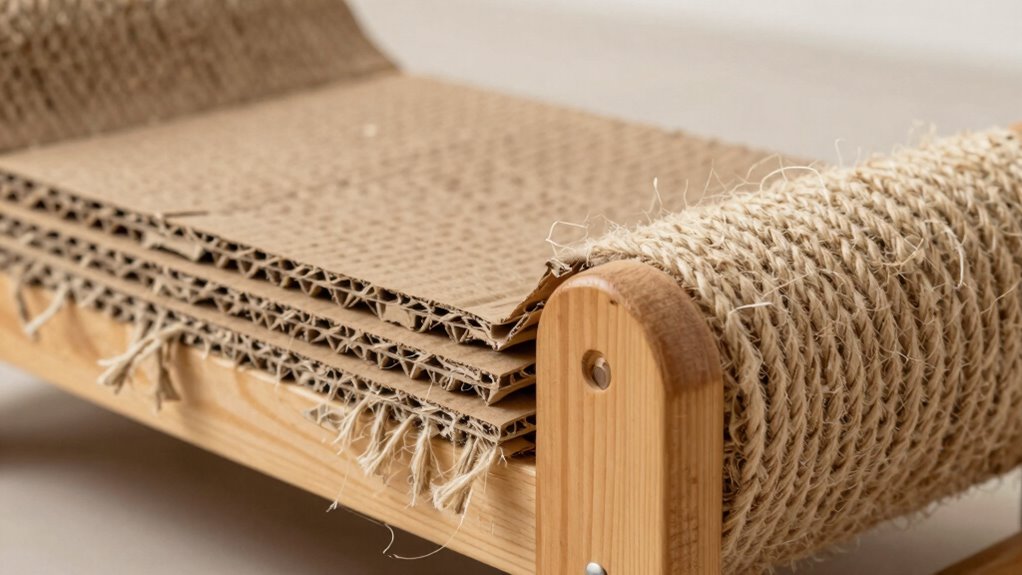
Using Wooden Pallets and Crates to Create Custom Scratchers
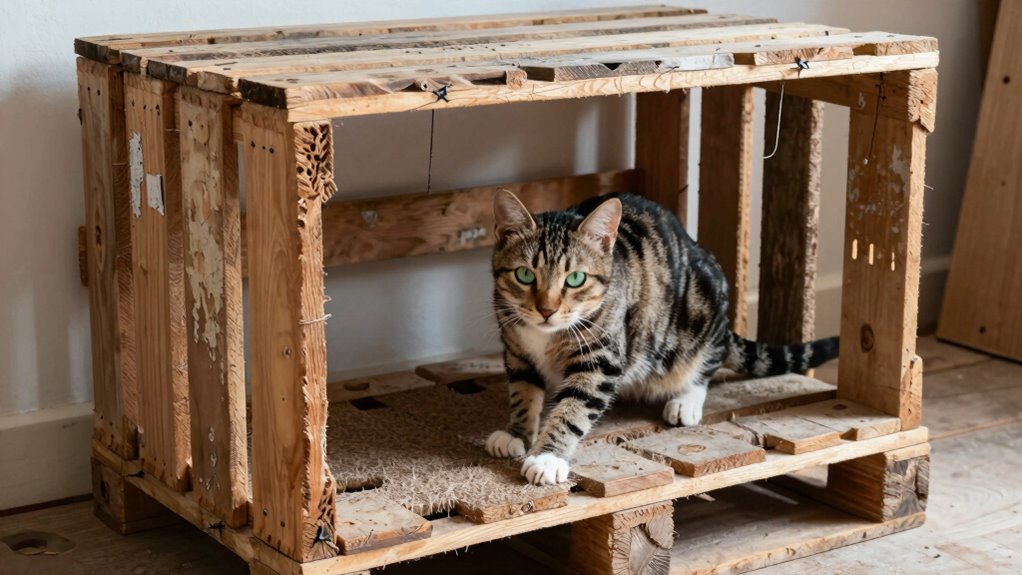
Transforming wooden pallets and crates into custom cat scratchers is a simple and cost-effective way to keep your feline entertained. These DIY projects offer a sturdy surface perfect for cat scratching, satisfying their natural instincts. To personalize your scratcher, consider adding sisal rope or roughened wood surfaces. Use the table below to plan your project:
| Material | Tools Needed | Additional Tips |
|---|---|---|
| Wooden pallet | Saw, drill, screws | Sand edges for safety |
| Crates | Sandpaper, staples | Secure with brackets |
| Sisal rope | Stapler, scissors | Wrap tightly for durability |
With minimal effort, you create a durable, inviting place that encourages scratching and play, making it a great DIY project for any cat owner.
Simple Tips to Make Your DIY Scratchers More Inviting for Cats
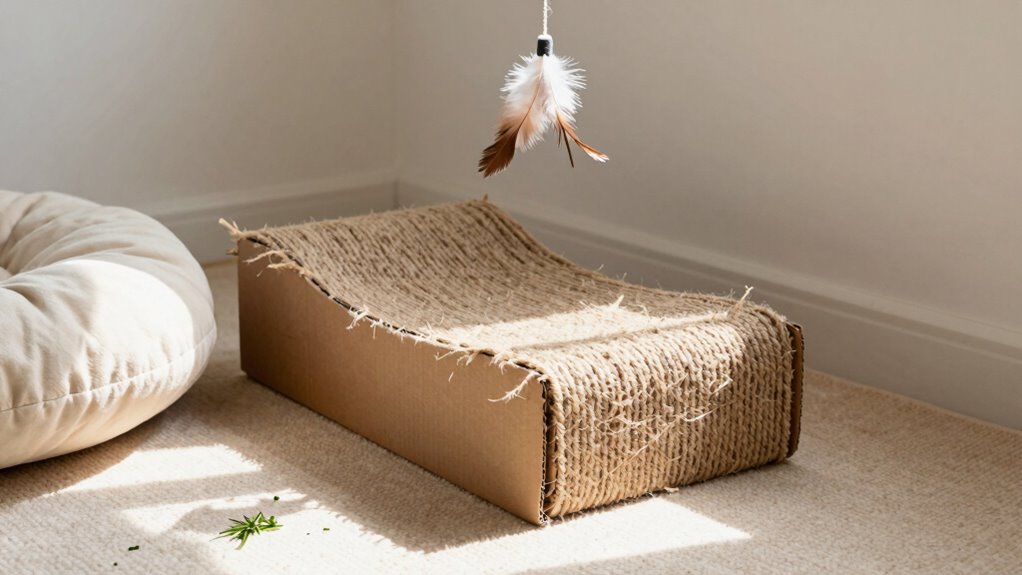
Adding inviting touches to your DIY cat scratcher can encourage your feline to use it more often and comfortably. First, rub a bit of your cat’s scent onto the scratcher to make it familiar and appealing. Next, enhance its visual appeal by adding colorful cushions or decorative fabric around it. You can also position the scratcher near favorite resting spots or windows, attracting your cat’s attention. Additionally, consider placing toys or hanging feathers nearby to entice interaction. Finally, keep the scratcher in a spot with good lighting and minimal drafts to make it feel cozy and secure. These simple tips create a more inviting environment, encouraging your cat to scratch and play, all while blending seamlessly into your home decor.
How to Keep Your DIY Scratchers Clean and Refresh Them Over Time
To keep your DIY cat scratcher clean and inviting, regular maintenance is essential. Establish a cleaning schedule to remove dust, loose fibers, and dirt that can accumulate over time. Use a vacuum or a brush to gently clean the surface without damaging the material. Depending on the material, you might also consider revitalizing it periodically—replacing worn-out sections or adding a new layer of sisal, cardboard, or other suitable materials. This material refresh keeps the scratcher appealing to your cat and extends its lifespan. Regular cleaning and refreshing not only maintain its attractiveness but also promote your cat’s hygiene and health. With consistent upkeep, your DIY scratcher will remain a favorite spot for your feline friend.
Troubleshooting Common Problems With Homemade Cat Scratchers
Even with careful maintenance, homemade cat scratchers can develop issues over time that affect their functionality and appeal. Common problems include loose materials, uneven surfaces, or materials that aren’t safe for your cat. To troubleshoot, first check for material safety—ensure no sharp edges or toxic substances. Next, examine the design for troubleshooting flaws:
Regularly inspect and reinforce your homemade cat scratcher to ensure safety and durability over time.
- Loose or unraveling fabric—re-secure or replace.
- Flattened or worn spots—rotate or add fresh material.
- Unstable structure—reinforce joints or supports.
- Unappealing surface—use appealing, durable materials that encourage scratching. Addressing these issues helps keep your DIY scratcher safe and inviting. Remember, proper design troubleshooting and material safety are key to maintaining a scratcher your cat loves and that stays functional over time.
The Benefits of DIY Scratchers for Your Cat’s Health and Happiness
Creating a DIY scratcher can boost your cat’s claw health and prevent damage to your furniture. It also encourages your cat to stay active and engaged through play. These simple projects directly contribute to your cat’s overall well-being and happiness.
Promotes Claw Health
Have you noticed your cat scratching more frequently or aggressively? This behavior is often linked to maintaining their claw health. A DIY scratcher helps support this natural cat behavior by providing a dedicated scratching zone. Imagine:
- A rough surface that naturally files down claws as your cat scratches.
- A sturdy base that prevents tipping over during vigorous scratching.
- An area that encourages your cat to stretch and extend their paws.
- A natural material like cardboard or sisal that mimics outdoor trees.
Encourages Exercise and Play
Did you know that a DIY cat scratcher can boost your cat’s activity levels and overall well-being? By encouraging scratching behavior, it provides essential cat enrichment that keeps your feline mentally stimulated and physically active. When your cat engages with a homemade scratcher, they exercise their muscles and burn off excess energy, reducing boredom and destructive tendencies. To understand its impact, consider this:
| Benefit | How It Works | Result |
|---|---|---|
| Physical exercise | Climbing, stretching, scratching | Maintains healthy weight |
| Mental stimulation | Interactive play with DIY materials | Prevents boredom and stress |
| Natural instincts | Mimics outdoor scratching and climbing | Supports natural behaviors |
| Reduces destructive behavior | Satisfies scratching urges | Protects furniture and belongings |
| Overall happiness | Engages your cat in fun, meaningful activity | Improves quality of life |
A DIY scratcher isn’t just fun—it’s crucial for your cat’s health and happiness.
Frequently Asked Questions
How Can I Ensure My DIY Scratcher Is Stable and Safe for My Cat?
To keep your DIY scratcher stable and safe, secure it firmly to the floor or wall with sturdy brackets or non-slip pads. Make sure it’s at the right scratching height for your cat, encouraging use. Add catnip attraction nearby to draw your cat to the scratcher, reducing the chance of it tipping over when in use. Regularly check for loose parts, and reinforce where needed to guarantee safety.
What Are Some Signs My Cat Prefers Certain Types of Scratchers?
You’ll notice your cat prefers certain scratcher materials, like sisal or cardboard, because they feel satisfying and natural. For example, if Fluffy consistently scratches the sisal post, it shows her preference for that material. Look for signs like frequent use, scratching sounds, or rubbing her face against it. These behaviors indicate her favorite scratcher type, guiding you to provide the most appealing and engaging options for her.
How Often Should I Replace or Refresh My Homemade Scratcher?
You should replace or refresh your homemade scratcher when you notice signs of wear, like frayed edges or reduced durability. Typically, the replacement frequency depends on your cat’s scratching habits and the scratcher’s durability, but check it every few weeks. If it starts to fall apart or loses its effectiveness, it’s time for a new one. Keeping it in good condition ensures your cat stays interested and avoids damage to furniture.
Can DIY Scratchers Help Reduce My Cat’s Furniture Scratching?
Yes, DIY scratchers can help reduce your cat’s furniture scratching by addressing their natural scratching motivation and improving their overall cat behavior. Some might worry they won’t be effective, but homemade scratchers made from appealing materials can be just as satisfying. When you provide engaging, accessible options, your cat’s urge to scratch furniture decreases, keeping your space cleaner and your furniture safe.
Are There Any Specific Colors or Designs That Attract Cats More?
Cats are often attracted to colors that resemble natural environments, like neutral tones or earthy shades. Bright, contrasting colors or complex designs might catch their eye, but their preferences vary. When choosing DIY scratchers, consider simple design choices and color preferences that blend with your home decor. Using natural or muted tones can make the scratcher more inviting, encouraging your cat to scratch there instead of furniture.
Conclusion
Creating your own cat scratcher is like giving your feline friend a cozy, personalized playground. It’s a simple way to keep your cat happy, healthy, and scratch-free from your furniture. Plus, using household items saves money and reduces waste. With a little effort, you can craft a scratcher that’s just as inviting as a favorite sunbeam. So, roll up your sleeves — your cat will thank you with endless purrs and playful leaps.