Creating a DIY agility course at home starts with measuring your space and planning an efficient layout. Use budget-friendly equipment like broomsticks for jumps, cardboard boxes for tunnels, and PVC pipes for weave poles. Make sure obstacles are safe and sturdy. Introduce techniques gradually, incorporating positive reinforcement to motivate your dog. Regularly maintain your course and adjust obstacles as your dog’s skills improve. Keep an eye out for more tips to really enhance your agility training experience.
Key Takeaways
- Measure your available space to ensure safe maneuverability for your dog while designing the agility course layout.
- Utilize household items like broomsticks, boxes, and pool noodles to create budget-friendly obstacles.
- Start with basic obstacles like jumps and weave poles, gradually increasing difficulty as your dog’s skills improve.
- Implement positive reinforcement techniques during training to encourage your dog’s engagement and confidence.
- Regularly inspect and maintain your DIY equipment to ensure safety and functionality during training sessions.

JMMPOO Dog Agility Training Equipment, 60-piece Dog Obstacle Course Training Starter Kit Pet Outdoor Game with Tunnel, Agility Hurdle, Weave Poles, Jump Ring, Pause Box, Toy Balls and Storage Bag
UNIQUE & HEALTH: Running, jumping, playing, and most of exercising for maximum dog agility. Whether training for competition…
As an affiliate, we earn on qualifying purchases.
As an affiliate, we earn on qualifying purchases.
Space Assessment and Planning

When setting up your DIY agility course, a thorough space assessment is crucial.
Start by measuring your available area to ensure your dog has enough room to maneuver between obstacles. Opt for versatile equipment that you can easily rearrange or store, especially if space is limited. Prioritize safety and suitability when selecting equipment to ensure it meets your dog’s specific needs.
Plan the layout to maximize flow and minimize hazards, ensuring your dog can safely navigate the course. Consider the adjustability of obstacles to accommodate different dog sizes and skill levels.
Incorporate basic obstacles like jump bars and weave poles, gradually increasing the difficulty as your dog improves.
With careful planning, you’ll create an engaging and safe environment that fosters your dog’s agility skills.
JMMPOO Dog Agility Training Equipment, 60-piece Dog Obstacle Course Training Starter Kit Pet Outdoor Game with Tunnel, Agility Hurdle, Weave Poles, Jump Ring, Pause Box, Toy Balls and Storage Bag
UNIQUE & HEALTH: Running, jumping, playing, and most of exercising for maximum dog agility. Whether training for competition…
As an affiliate, we earn on qualifying purchases.
As an affiliate, we earn on qualifying purchases.
Budget-Friendly Equipment Choices

Creating an engaging DIY agility course doesn’t have to break the bank. You can easily repurpose household items to craft budget-friendly equipment.
For jump bars, grab some broomsticks and chairs to create adjustable heights. Use boxes or laundry baskets as tunnels for your dog to dash through. Arrange cones or plastic cups to mimic weave poles, and bend pool noodles into arches for jumps or hurdles. Creating weave poles can be achieved by simply lining up these items for your dog to practice weaving through.
Old blankets or towels can serve as soft pause tables for resting. Hula hoops make great jump-through rings, while cardboard boxes can be transformed into tunnels.
Keep safety in mind by ensuring everything is sturdy and non-slip. With a little creativity, you can build a fun and affordable agility course right at home!

Pet Prime Dog Agility Training Equipment for Dog Obstacle Course Backyard Height Adjustable Jumper Hurdle Bar Portable Dogs Park Exercise Tool
Customizable Height: Our agility hurdles can be adjusted to fit dogs of all sizes and skill levels, making…
As an affiliate, we earn on qualifying purchases.
As an affiliate, we earn on qualifying purchases.
Selecting the Right Obstacles

After gathering your budget-friendly equipment, it’s time to choose the right obstacles that will keep your dog engaged and challenged.
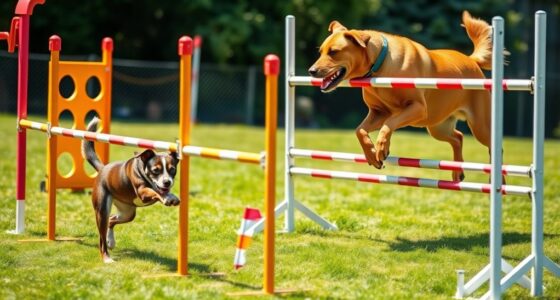
Start with jumps to build strength and spatial awareness; adjustable heights can increase the difficulty as your dog improves. Incorporate weave poles for coordination, beginning with three and adding more as they master the skill. Agility training unleashes pets’ potential and fosters a fun environment.
Tunnels can enhance speed and command-following, while a teeter-totter tests balance and confidence. Don’t forget A-frames to develop strength and balance. For added complexity, consider balance beams and pause tables for focus and control. Always assess your space, ensure obstacles are secure, and supervise your training sessions to keep things safe and enjoyable for your furry friend.
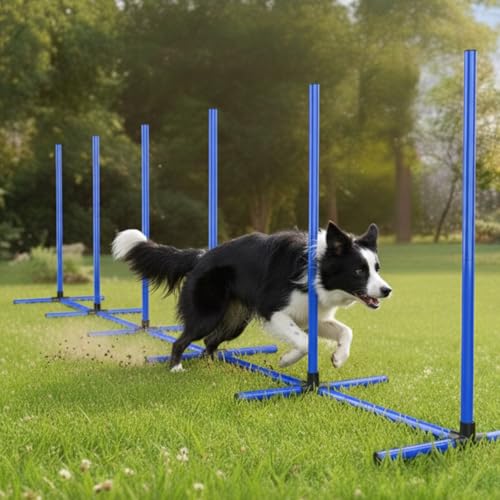
MAICOBI 6 Weave Poles & 2 Hurdle Dog Agility Set, Indoor & Outdoor Training Equipment with Support Feet, 31" Height, 24" Spacing, Storage Bag
ONE SET, TWO TRAINING MODES: Transforms easily from 6 connected weave poles into 2 hurdle jumps, giving you…
As an affiliate, we earn on qualifying purchases.
As an affiliate, we earn on qualifying purchases.
DIY Equipment Ideas

While designing a DIY agility course, you can get creative with equipment that’s both effective and budget-friendly. For jumps, use PVC pipes and pool noodles to create adjustable hurdles, or balance a broomstick across two chairs. Dog agility training provides not only physical exercise but also enhances listening abilities in dogs, making it an enjoyable experience for both you and your pet. Engaging in such activities also promotes physical activity that contributes to overall health and well-being.
Weave poles can be made by securing PVC pipes vertically in the ground or arranging cones in a line. For tunnels, bend pool noodles into arches or use cardboard boxes for a fun challenge.
To introduce balance obstacles, construct a teeter-totter with a plank or build A-frames with non-slip surfaces. Always ensure stability and start with low heights, gradually increasing as your dog gains confidence.
With these DIY ideas, your agility course will be engaging and tailored to your pup’s needs.
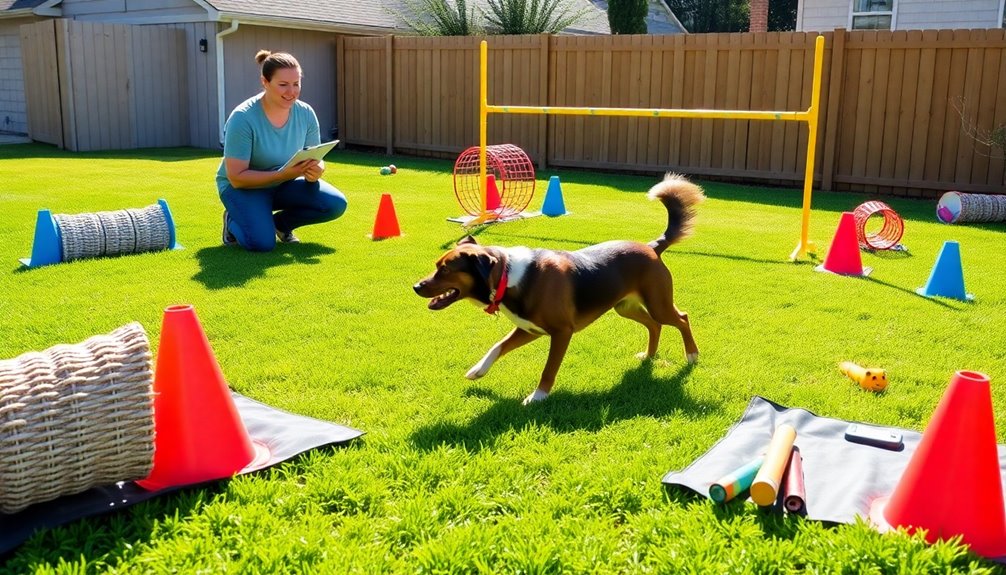
Setting Up Your Course

Building your DIY agility course is an exciting step, and setting it up correctly can make all the difference in your dog’s training experience. Start by assessing your available space to ensure there’s enough room for obstacles and safe movement. Keep your budget in mind while selecting suitable obstacles for your dog’s size and fitness level. Design a flowing course that challenges their agility and problem-solving skills, incorporating variations to keep it engaging. The A-Frame serves as an excellent agility obstacle for your backyard setup.
Securely place each obstacle to prevent accidents, and arrange them for smooth transitions. Prioritize safety by removing hazards and supervising your dog during training. As your dog improves, adjust the difficulty to maintain their interest and challenge, and use durable materials for easy maintenance.
Training Techniques and Safety
To ensure your dog thrives in agility training, mastering effective techniques and prioritizing safety are essential.
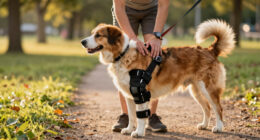
Start by teaching basic commands like sit, stay, and come. Use positive reinforcement with treats and praise to build trust. Introduce obstacles gradually, allowing your dog to acclimate to each challenge. Consistency is key—regular training sessions help maintain focus. Incorporating agility training using improvised household objects can create engaging challenges without needing to travel. Additionally, be mindful that newborn safety guidelines can also apply when training around small children or pets.
Safety should never be overlooked. Securely set up all obstacles to prevent accidents, and always supervise training sessions. Use proper techniques while guiding your dog to minimize injury risks, and ensure there’s ample space between obstacles.
Regularly check your equipment to keep it safe and functional. With patience and care, you can create a fun and secure agility training environment for your dog.
Benefits of Agility Training

Agility training offers a multitude of benefits that go beyond basic obedience and fitness.
You’ll notice enhanced muscular strength as you engage various muscle groups through multi-directional movements. Your cardiovascular fitness improves, too, with heart-pumping drills that boost aerobic capacity. Increased flexibility and better proprioception help you execute rapid changes in direction while reducing injury risk. Engaging in agility exercises also serves as an excellent heart-pumping workout that contributes to overall heart health.
On a cognitive level, agility training sharpens your mental focus and decision-making skills, enhancing your overall performance. You’ll develop better body awareness and coordination, making your movements more precise.
Plus, if you include your dog, they’ll enjoy improved physical fitness, mental stimulation, and increased confidence, deepening the bond between you both.
Embrace agility training for a fun and rewarding experience!
Maintaining Your Agility Course

Maintaining your agility course is essential for ensuring a safe and enjoyable training environment for both you and your dog. Regular inspections help you identify and repair any damaged equipment, keeping everything in top shape. Additionally, maintaining your course will help improve coordination and physical fitness for your dog. Establish a cleaning schedule to remove dirt and debris from obstacles, which enhances safety and performance. When not in use, store your equipment properly to prevent damage and free up space in your yard.
Always supervise your dog during training to avoid accidents, and use proper techniques to protect their joints. Remember to budget for repairs or replacements over time, ensuring your course remains engaging and safe. With consistent maintenance, your DIY agility course will provide endless fun and growth for you and your dog.
Frequently Asked Questions
What Age Should My Dog Start Agility Training?
Your dog can start agility training as early as 8 weeks with basic skills like flatwork.
However, you should avoid high-impact activities until their growth plates close, typically around 18 months.
For small breeds, you can introduce full courses at about 1 year, while larger breeds should wait until they’re fully mature.
Always prioritize safety and consult your vet to ensure your dog’s ready for specific obstacles and activities.
How Long Should Each Training Session Last?
You wouldn’t want to burn out your furry friend, right? For young pups, keep training sessions to just 2-3 minutes, while adult dogs can handle 5-10 minutes.
Always end after 2-3 successful repetitions to keep their spirits high. Frequent, short sessions maintain motivation, prevent overexertion, and enhance learning.
Adjust the length based on your dog’s age, fitness level, and energy, ensuring they stay excited and engaged for every training adventure!
Can I Train Multiple Dogs Simultaneously?
Yes, you can train multiple dogs simultaneously, but it takes careful management.
Start with minimal distractions to help each dog focus. Use techniques like station training, where each dog waits in their area while another is being trained.
Rotate between dogs to keep them engaged and motivated. Remember to reward behaviors immediately and maintain consistency.
This approach not only enhances their training but also improves your handling skills as you compare their responses.
What Should I Do if My Dog Refuses Obstacles?
When your dog refuses obstacles, it can be frustrating yet revealing. On one hand, this hesitation indicates fear or confusion; on the other, it opens the door to deeper understanding.
Start by assessing their motivation and comfort level. Gradually introduce the obstacle, using positive reinforcement to encourage progress.
Consistent commands are crucial, so ensure your signals are clear. Stay patient and supportive; building confidence today leads to success tomorrow.
How Do I Know if My Dog Enjoys Agility Training?
To know if your dog enjoys agility training, watch for their enthusiasm. If they eagerly approach obstacles, wag their tail, or show excitement during sessions, that’s a good sign.
Notice how they respond to commands—if they’re focused and engaged, they likely enjoy it.
Also, consider their willingness to learn new tasks and adapt to various environments. A happy dog is a dog that enjoys the challenge, so pay attention to their cues!
Conclusion
Creating a DIY agility course at home is a rewarding blend of fun and fitness. While you might start with a simple setup, the joy of watching your furry friend navigate through obstacles brings immense satisfaction. As they leap and weave, you’ll see the bond between you grow stronger. With a little creativity and dedication, your backyard transforms from a mundane space into a vibrant training ground, proving that with a bit of effort, playtime can become a powerful workout.