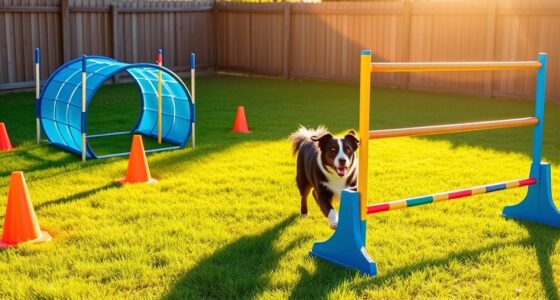
To create a budget-friendly agility course at home, choose affordable, durable materials like PVC pipes, recycled wood, or fabrics. Build obstacles such as jump bars, tunnels, weave poles, and balance beams using simple tools and common items. Organize your space for safety and variety, and regularly inspect and maintain your setup. Keep your course fun and effective with small upgrades and creative touches—continue exploring how to get the most out of your DIY agility world.
Key Takeaways
- Use inexpensive, safe materials like PVC pipes, lightweight wood, and recycled items to build durable agility obstacles.
- Design adjustable, modular obstacles such as jump bars and weave poles for versatility and cost savings.
- Organize the course layout with simple markers and proper spacing to ensure safety and easy navigation.
- Regularly inspect and maintain obstacles, reinforcing worn spots with padding and non-slip surfaces for safety.
- Incorporate creative upgrades like ramps, tunnels, and visual cues to keep training engaging without high costs.
Choosing Affordable Materials for DIY Equipment
When creating DIY agility equipment, selecting affordable materials can make a big difference in keeping costs low without sacrificing quality. You want to focus on cost-effective materials that are durable and safe for your dog. Look for budget-friendly tools like PVC pipes, lightweight wood, or recycled items that can be repurposed. These materials are easy to find and often inexpensive, making them perfect for a home course. Avoid costly alternatives that may seem appealing but aren’t necessary for safety or function. By choosing materials that balance affordability with durability, you ensure your equipment lasts without breaking the bank. Additionally, considering material safety standards is essential to ensure your DIY setup remains secure and reliable. Using materials that meet safety regulations can help prevent accidents and ensure your dog’s safety during training sessions, especially when working with homemade equipment. Incorporating durable building materials can further enhance the longevity of your course and provide peace of mind. Incorporating cost-effective options like recycled or repurposed items can also help you stay within your budget while maintaining safety and durability.
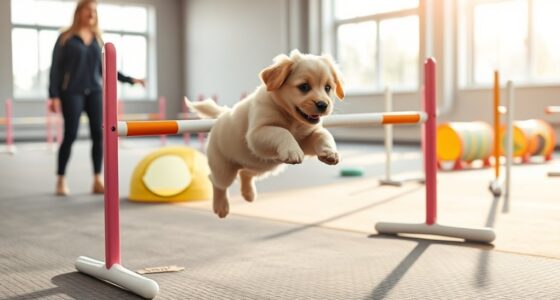
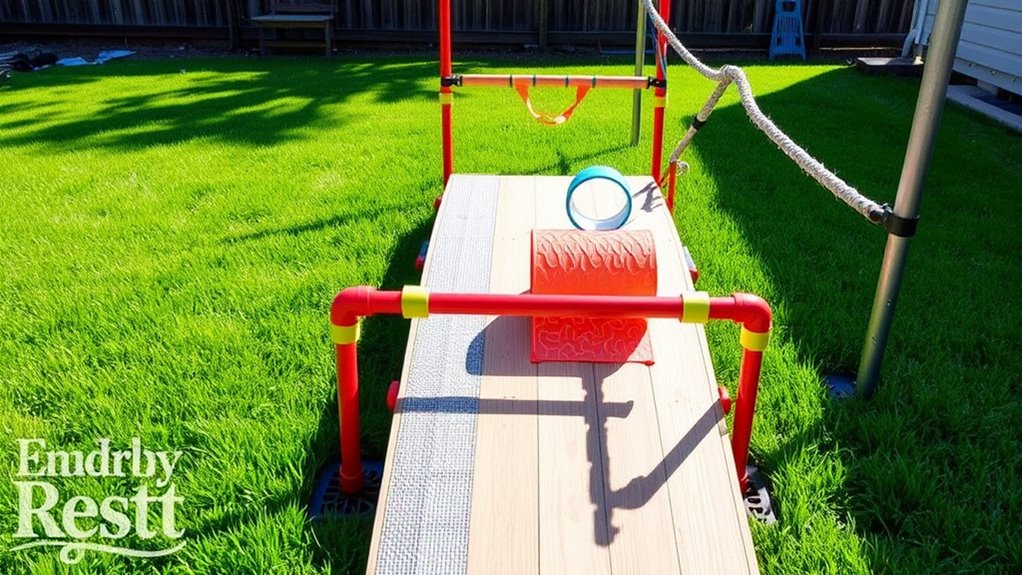
Building a Budget-Friendly Jump Bar
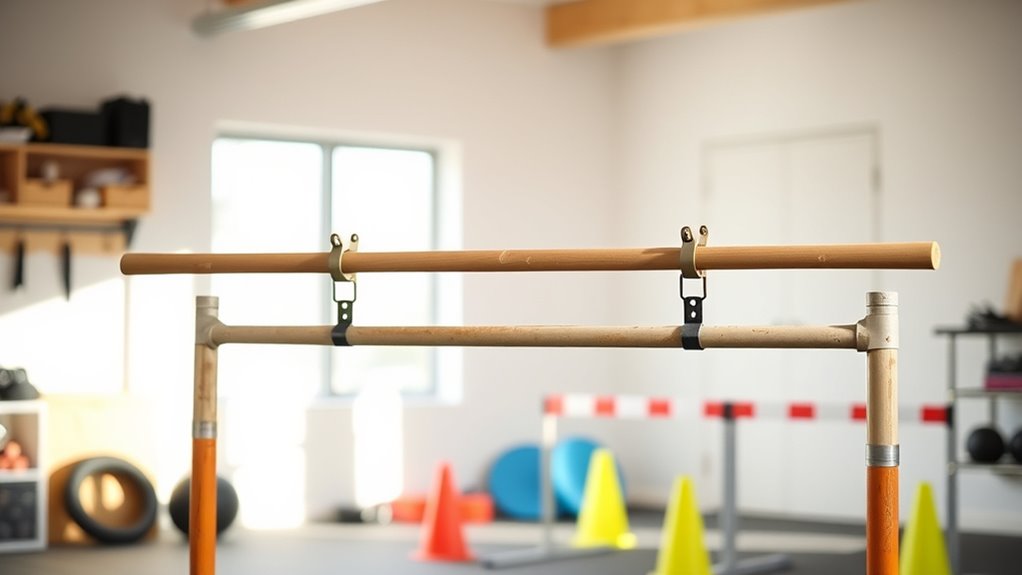
Creating a budget-friendly jump bar is simple when you choose affordable, durable materials like lightweight PVC pipes or sturdy wooden dowels. These materials are perfect for building a reliable jump that can help your dog train agility without breaking the bank. To assemble, cut the pipes or dowels to your desired height and secure them with tape or adjustable brackets. For added stability, use sandbags or heavy bases underneath. This DIY jump bar isn’t just cost-effective; it also serves as an essential dog sports accessory for training agility at home. You can customize the height to suit your dog’s skill level and easily disassemble it for storage. Additionally, understanding the importance of safety precautions can help you prevent injuries during training sessions. Incorporating proper training techniques can further enhance your dog’s agility and confidence. Using correct equipment ensures your training remains effective and safe for your pet. With a little effort, you’ll create a versatile, safe obstacle that enhances your training sessions. Additionally, understanding the importance of family dynamics can help you cultivate a supportive environment for your pet’s training journey. Incorporating positive reinforcement can motivate your dog and improve training outcomes.
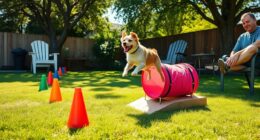
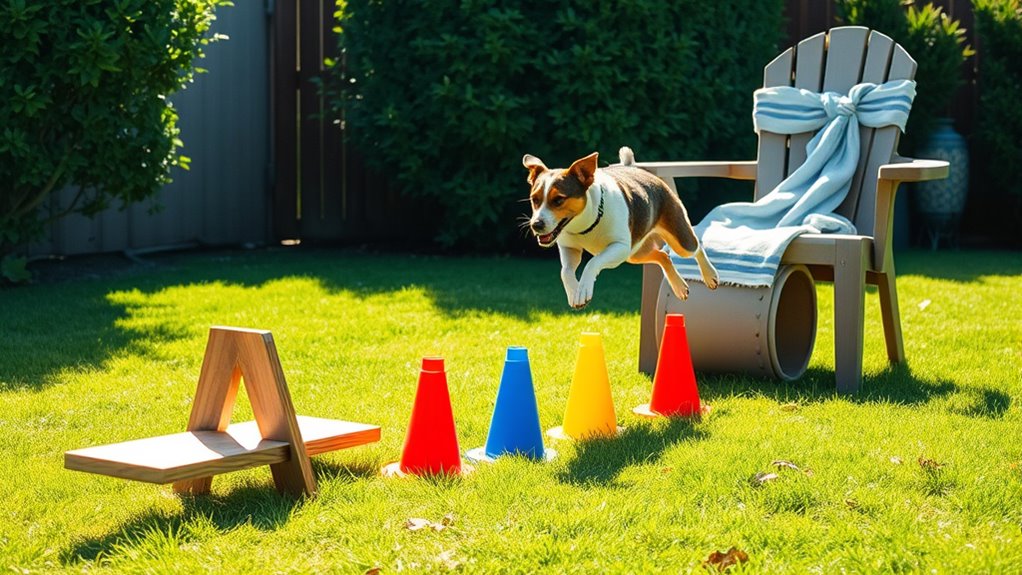
Creating a DIY Tunnel and Crawl Space

Looking for an easy way to add a fun and challenging obstacle to your dog’s agility training? Creating a DIY tunnel and crawl space is simple and cost-effective. These obstacles are rooted in dog agility history, emphasizing safety and fun. Here are four tips to get started:
Create fun, safe DIY dog agility obstacles with simple, cost-effective tunnel and crawl space ideas.
- Use durable fabrics like PVC pipes covered with tarp for a sturdy tunnel.
- Secure the tunnel ends to prevent collapsing and ensure safety.
- Create a crawl space by laying down low-height barriers or boxes for your dog to pass through.
- Always supervise your dog and introduce obstacles gradually to prevent injury.
- Consider incorporating Floating on Water such as lightweight tents or foldable panels to make the setup even more versatile and adaptable. This ensures the obstacles are visible and engaging for your dog, enhancing the training experience.
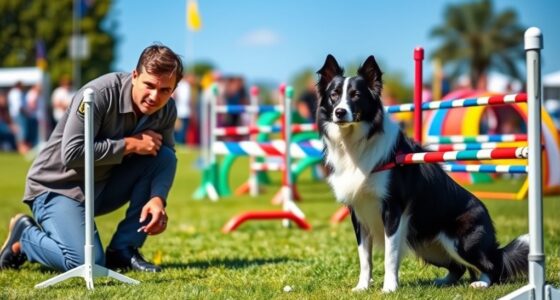
Setting Up a Cost-Effective Weave Poles Course
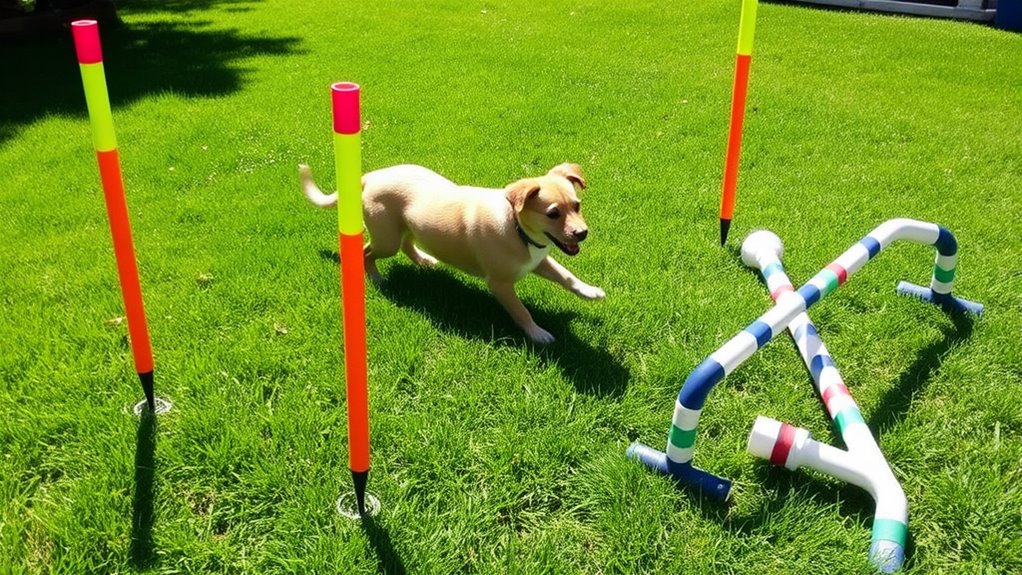
Building on your DIY obstacle course, setting up a budget-friendly weave poles course is straightforward and affordable. Start by using everyday materials like PVC pipes or broomsticks, which are lightweight and easy to arrange. Space the poles about 18 inches apart to promote proper training progression without overwhelming your dog. Secure the poles to the ground with simple stakes or heavy objects to guarantee obstacle safety, preventing unwanted movement during training. You can create a zigzag pattern using inexpensive cones, chairs, or even bottles to guide your dog through the weave. Keep the course flexible and adjustable, gradually increasing difficulty as your dog improves. Focus on consistency and positive reinforcement to ensure safe, effective training without breaking the bank. Additionally, understanding the importance of training regulations and safety guidelines can help you create a compliant and secure course for your pet. Incorporating automation technologies in your training setup, such as timers or remote clickers, can further enhance your practice sessions efficiently. Being aware of fetal development stages can also help you plan training sessions around your dog’s energy levels and ensure a safe environment. Furthermore, paying attention to emotional well-being can foster a more positive learning experience for your dog. For improved results, using proper training techniques can make your DIY course more effective and enjoyable for your pet.
Designing a Simple and Safe Balance Beam
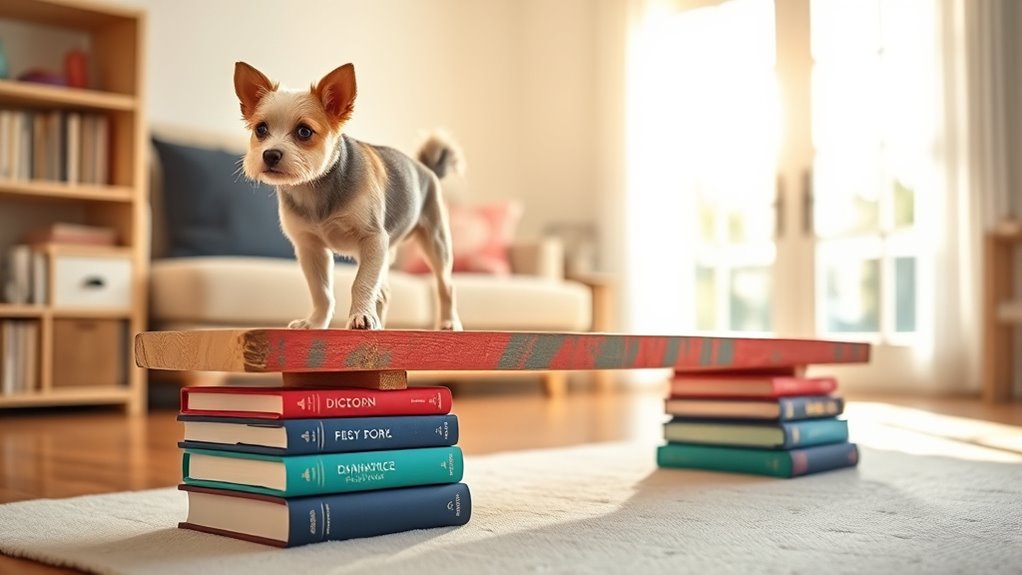
To design a simple and safe balance beam, start with a stable, low-level platform that your dog can easily step onto and off of without fear. Ensuring balance beam safety is key, so choose a non-slip surface and secure the beam firmly. Consider these tips:
Start with a stable, low platform using non-slip surfaces for safe, confident dog training.
- Use adjustable supports to modify the beam height, making training easier and safer.
- Keep the beam low initially, gradually increasing height as your dog gains confidence.
- Opt for lightweight materials that are easy to move and store.
- Add visual cues like tape or contrasting colors for better focus and safety.
- Incorporating industry best practices such as proper material selection can further enhance your DIY agility course safety and effectiveness. Additionally, regularly inspecting the beam for wear and stability helps prevent accidents and maintains training safety. Paying attention to sleep and mental health during training sessions can also improve focus and reduce stress for your dog. Moreover, understanding the benefits of home-based training can motivate you to create an engaging and safe environment for your dog’s agility development.
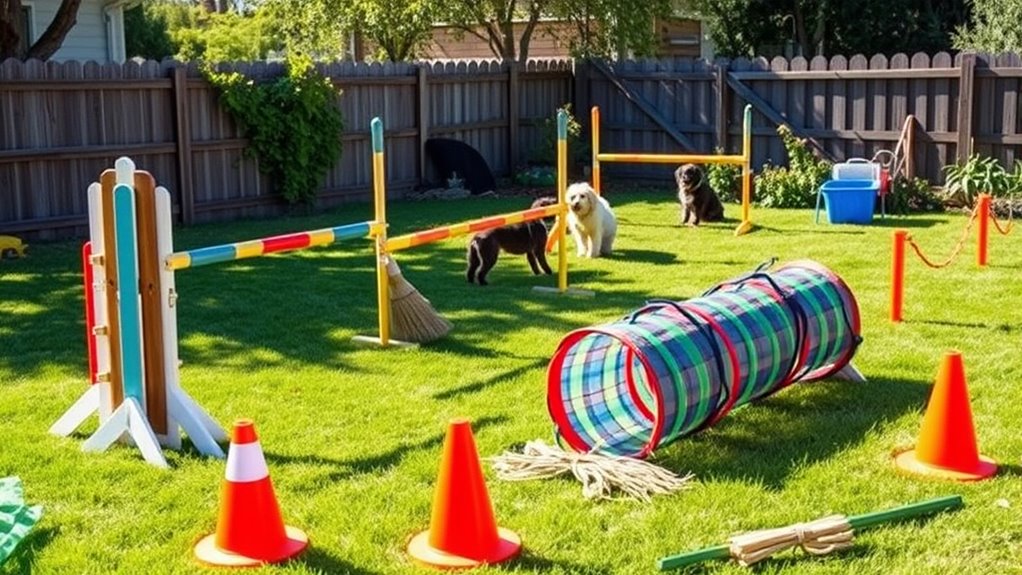
Organizing Your Backyard for a Complete Course
Creating an organized backyard is essential for setting up a safe and efficient agility course. Knowing the dog agility history helps you appreciate how courses evolved, guiding your layout choices. To plan your training sessions effectively, designate specific zones for different obstacles, ensuring clear pathways and ample space. Use inexpensive materials like cones, broomsticks, or buckets to mark jumps and tunnels. Keep obstacles spaced properly to prevent accidents and allow your dog to move freely. Regularly assess your setup, adjusting obstacle placement for variety and safety. Clear signage or color coding can help you stay organized and streamline training sessions. An orderly backyard not only prevents confusion but also keeps your dog engaged and enthusiastic to learn new skills. Understanding obstacle spacing principles can further enhance your course layout for safety and effectiveness, especially by considering training space requirements to accommodate different skill levels. Additionally, researching equipment quality ensures durability and safety during training.
Tips for Maintaining and Improving Your DIY Obstacles
Regularly inspect your obstacles to catch any wear or damage early and keep them safe for training. Get creative with upgrades by adding new elements or adjusting heights to challenge yourself. Simple tweaks can keep your course fresh, fun, and effective without breaking the bank.
Regular Obstacle Inspection
Even if your obstacles seem sturdy, inspecting them regularly is essential to guarantee safety and performance. Conducting routine safety checks helps identify weak spots or damage before they cause accidents. Follow a consistent maintenance schedule to keep your obstacles in top shape. Here are four key steps:
- Check for loose or damaged bolts and screws
- Examine the structural integrity of wood or PVC components
- Look for splinters, cracks, or splinters that could cause injury
- Test stability by applying gentle pressure or weight
Creative Obstacle Upgrades
To keep your DIY obstacles engaging and safe, consider creative upgrades that enhance both their functionality and appearance. Innovative obstacle concepts can challenge your agility in new ways, keeping training fresh and exciting. You can add colorful paint or tape to improve visibility and aesthetics, making your course more inviting. Obstacle customization ideas like adjustable heights or removable components allow you to tailor challenges to your skill level or training goals. Reinforcing worn spots with extra padding or non-slip surfaces boosts safety and durability. Incorporate simple modifications such as adding ramps, tunnels, or hanging elements to diversify your course. These creative upgrades don’t require much expense but can notably improve your agility training experience, keeping your DIY obstacles effective, safe, and visually appealing.
Frequently Asked Questions
What Safety Considerations Should I Keep in Mind During DIY Agility Training?
When doing DIY agility training, you should prioritize pet safety by designing obstacle courses that are secure and appropriate for your dog’s size and skill level. Always keep a pet first aid kit nearby in case of injuries, and regularly inspect equipment for hazards like sharp edges or loose parts. Avoid overexertion, and supervise your dog closely to prevent accidents. Proper obstacle design and safety precautions help guarantee a fun and safe training session.
How Can I Customize Obstacles for Different Dog Sizes and Skill Levels?
You might think one size fits all, but customizing obstacles for different dog sizes and skill levels is smarter than you’d believe. Use simple size adjustments like height and width modifications, and incorporate skill differentiation by adding or removing challenge elements. This way, your dog stays engaged and safe, regardless of their size or ability. Ironically, a tailored setup makes training more effective, proving that thoughtful customization benefits everyone involved.
Are There Specific Tools Recommended for Assembling DIY Agility Equipment?
For assembling your DIY agility equipment, you should focus on using sturdy DIY materials like PVC pipes, wooden planks, and heavy-duty screws. Assembly tricks include pre-drilling holes for easier fitting and using brackets for added stability. These tools and tips help guarantee your obstacles are safe and durable, making your training sessions both fun and effective. Always prioritize safety and double-check connections before use.
How Often Should I Replace or Repair Homemade Obstacles?
Think of your homemade obstacles as your loyal sidekick, needing regular check-ups to stay strong. You should inspect them weekly for signs of wear, like splinters or wobbling, and repair or replace parts as needed. Obstacle durability varies, but following a consistent maintenance schedule guarantees safety and longevity. If an obstacle shows significant damage or structural instability, it’s time to replace it to keep your training safe and effective.
What Are Some Budget-Friendly Ways to Store and Transport DIY Courses?
To store and transport your DIY agility courses affordably, consider using storage solutions like plastic bins or stackable crates that keep obstacles organized and protected. You can also repurpose items like laundry baskets or old suitcases for easy transportation. For transportation tips, use a sturdy wagon or a large tote with handles, making it simple to move your courses between training spots without extra costs.
Conclusion
With a little creativity, a few affordable materials, and some planning, you can build an engaging agility course right at home. You’ll enjoy designing, constructing, and improving each obstacle, making training fun, budget-friendly, and rewarding. Keep experimenting, stay safe, and celebrate your progress. Remember, the key is persistence, patience, and passion. So, embrace the challenge, enjoy the process, and watch your furry friend thrive on your homemade agility course.